Network Something

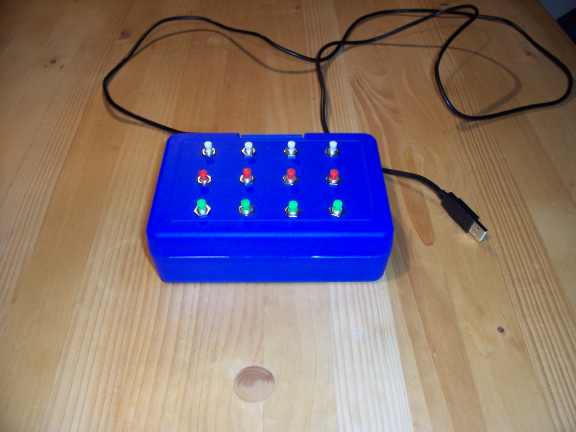
One day it hit me. I wanted to connect my coffee-machine to the internet. and my television…and my desk light… There are different approaches. One of the most stupid ones was to stuff a relais-board into my pc and….greeaaat idea..absolutely….”sorry, I cannot cook coffee because I first have to reboot my computer….” nope.

One possible solution can be found at beyondlogic but to me this approach is a little bit too professional. The most obvious solution to me was taking a so called ‘printserver’. These thingies can turn an ordinary printer (with a parallel port only) into a printer with a network connector. The good thing is they are approximately as big as a pack of cigarettes. Do we need more?


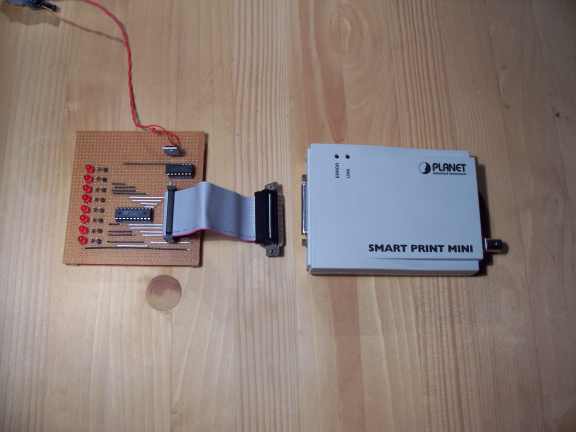
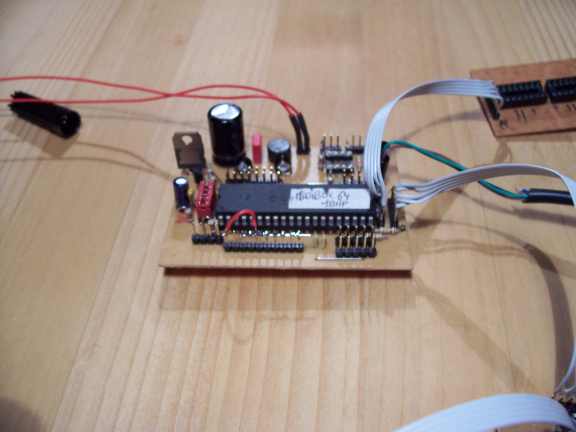
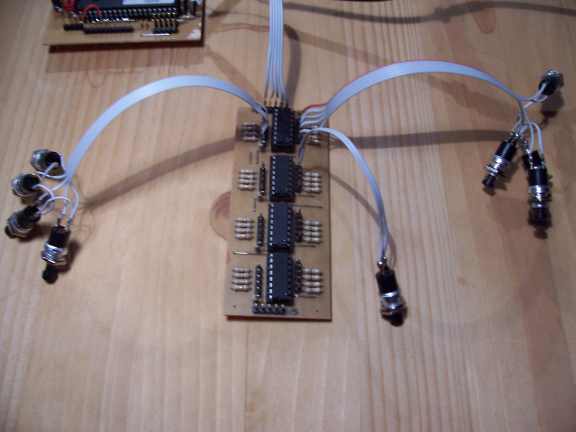
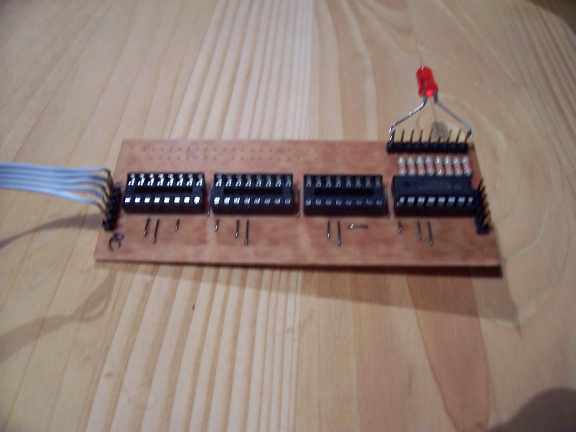
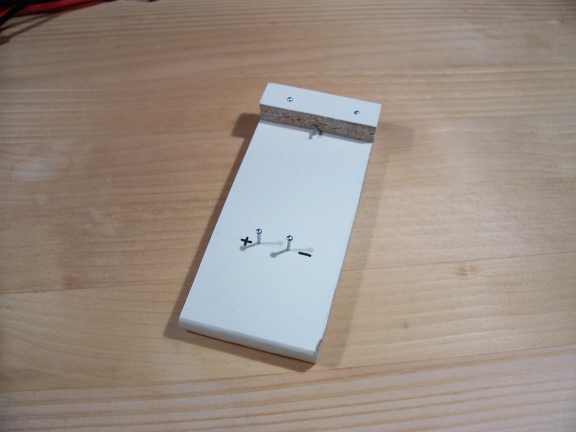
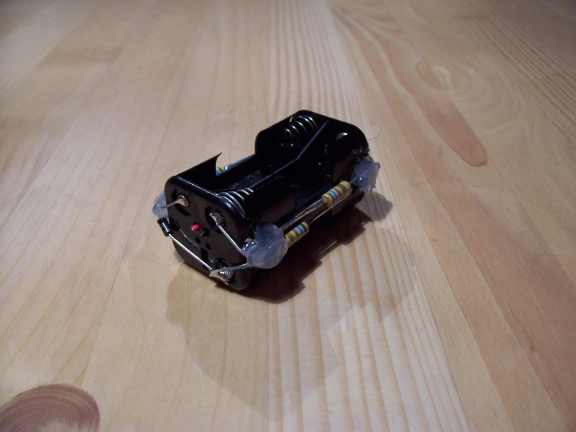
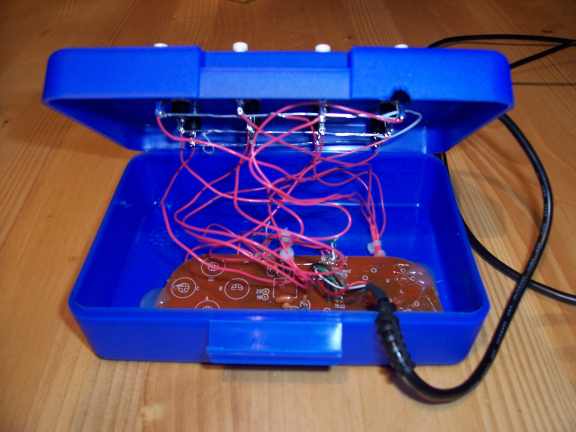
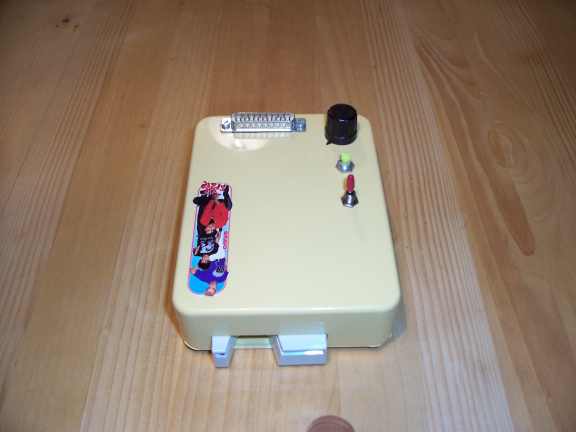
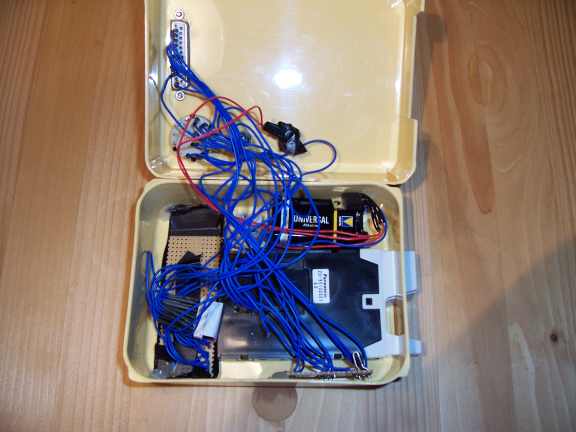
The only thing missing is the circuit that will act as a printer towards the printserver. With a little research (and lots of trial-and-error) this circuit evolved. It mainly consists of a 74ls373 (shift register, parallel i/o) and a 74ls00 (nand-gate). The circuit, the software, the description and a few pictures can be downloaded here (zip, 4,8 MB).

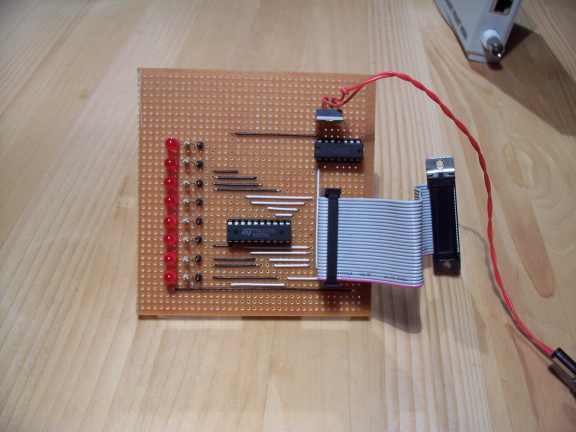
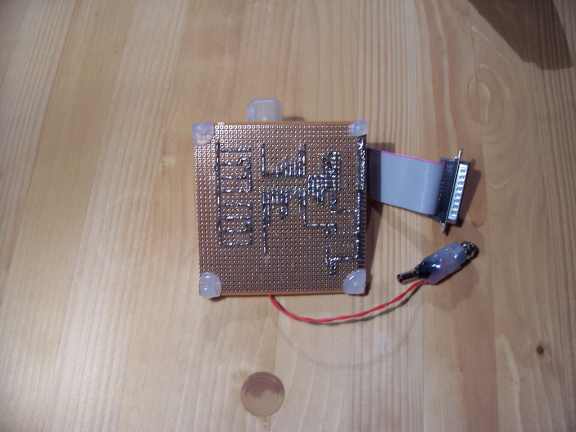
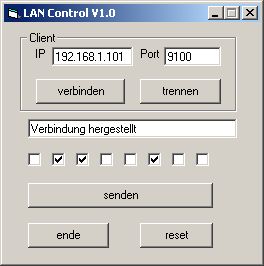
The power supply comes directly from the printserver. Hotglue doesn’t come with style but who cares – it works. The software is rather simple visual basic stuff. Basically the value for the output byte of the lpt port is sent to the network address of the printserver. Nice to see when things come up that easy.

B.t.w: cost of material is at about 2,50 €uros. The printserver was sold very cheaply by a friend of mine. Someone has to undercut that!

Update (6.6.2006):

Meanwhile some people became attentive to this project. One of them is matthias dierolf who found this project via the microcontroller-forum. After some basic questions he not only was able to rebuild a working interface himself but also rewrote the software and the circiut diagram completely. Now it’s way better to read and understand. The fact that he uses a printserver from a completely different vendor shows that this should hack work with every device capable of communicating via the so called RAW-format

Thanks, mate!
All the project-files (from Matthias and me) including photos can be found here (zip, 4,8 MB).

Important note: should you ever get the idea of switching 110/220 V (or more) with this thing think about what you will be doing BEFORE. Pay attention to galvanic separation, safety regulations, etc. Due to the fact that there are no security mechanisms implemented it’s basically possible for everyone on the internet to switch your TV, coffee-machine, toaster,…..

I won’t take any responsibility for what you will be doing. Don’t say I didn’t warn you.


[February, 2nd, 2007]

Finally, the little thingy made it into youtube:

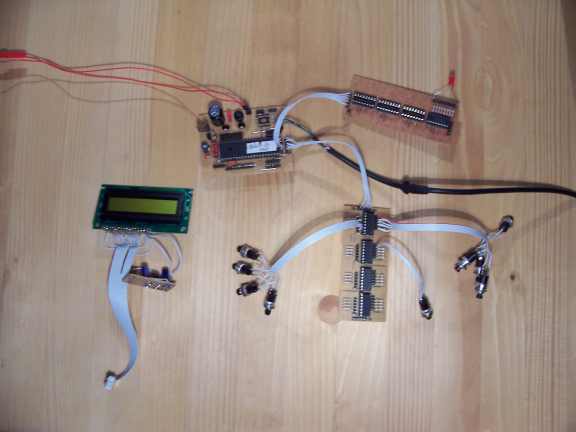
You can see the circuit with the printserver on the one side. they are connected to a latop via an ordinary switch. the laptop runs a ‘ping’ to verify the existing connection. the software on the left side to the screen is set to light the first for digits / pins.

[tube]http://www.youtube.com/watch?v=YytqCtpx1Z8&feature=player_embedded[/tube]

[27.2.2007]


I already said it before: a few days ago this thing has been featured at Hack-A-Day. This did not only cause a gigantic increase in my hitcount but it also gave me the possibility to get into contact with people being interested into this. Boyan Biandov was one of those who had the idea to drive an LCD with the circuit.

He already had a display lying arround from earlier experiments and just tried to attach it to the lpt-port of his Jet Direct ex3 Box. The result is that he is now able to connect to the box via netcat and port 9100 and…see for yourself:


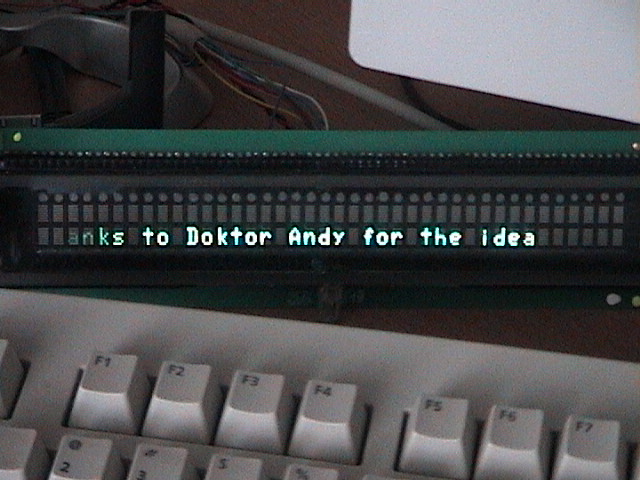
Yes, it is a network-operated display. Great. The display he uses is a IEE 03601-96 2×40 VFD. Datasheet and connection diagrams will be added to the archive soon. Boyan told me he plans to use this thing to control his camera rack.

After seeing his success I wanted to try this myself but due to availability and price I preferred to try it with an HD44780 compatible lcd.

It took me one night of work but then….


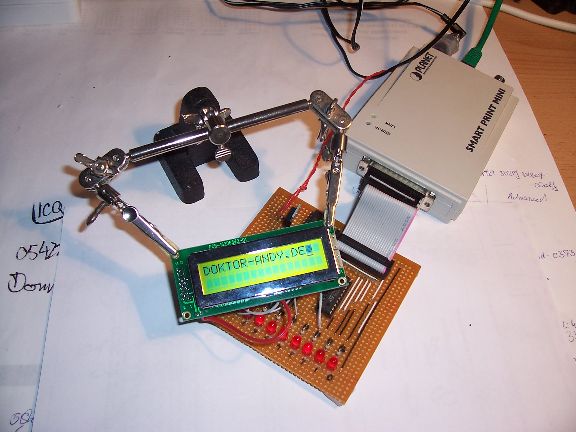
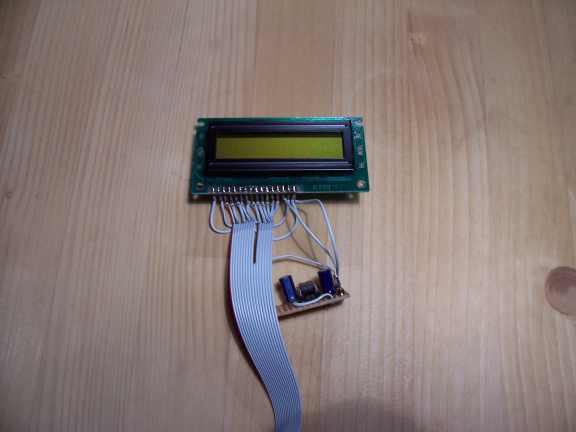
Right: What you are seeing jere is an HD44780 compatible lcd that can directly be connected to a network.

The trick (which truely isn’t one) is to operate the display in 4bit-mode. This means it only takes 6 lines for operation (4 data lines, control and enable). All in all you only have to sacrifice 5 data-lines because the ENABLE signal is dirived from the inverted STROBE signal which is created by the printserver when data are being sent to its lpt-port.

This is nearly too easy =-))

Caused by my lack of knowledge concerning the operation if these displays (last night was the first time I ever dealt with this topic) the operation is still a a little scetchy. Means: The 4bit nibbles are created by clicking them together with the tool that’s normally taken to control the leds and then sent to the device- nibble by nibble.

Takes some time but at least it works.


Despite running various test I culdn’t manage to operate an HD44780 compatible display without the shift-register and the nand-gate. I think this is related to timing problems. If an lcd is directly connected to the lpt port (of cause with some pull-down resistors, etc) nothing will happen even though a clean initalization squence is run. debugging without an oscilloscope looks a little difficult to me so I am taking into account that I have to solder two more parts.

As soon as the Content is uploaded and I get to recoordinate my private life I will create a program for controlling the lcd. circuit diagrams, archive etc will also be updated as soon as possible.


[9.8.2007]

Unfortunately I don’t have too much time at the moment to work on this project. At least I was able to restructure (and translate) the documentation, circuits, etc and pack them into a neat archive. The scripts which were send to me during the last weeks are also included. As soon as I have a little more time to spend I will pick up the work on this. righ now I have to say at least one big ‘Thank You’ to all the people who participated in this project up to now.

Download (6,3 MB)


[12.7.2010]

It’s kind of unbelievable but there are still people contacting me with questions about this device. This surely IS cool and you can all feel free to ask me as much as you want – I’ll give my best to help you all. But meanwhile new possibilities to realize such a device have been developed. My favourite solution to control basically anythting via network is the Arduino platform. If you didn’t hear about it yet: It’s an open source microcontroller platform. The Controller is programmed in a C-like language which is easy to learn. The IDE is based on JAVA and is available for all major operating systems. There is already a huge amount of extensions available. They are called ‘Shields’. The Ethernet Shield has become one of the most important ones for me. Arduino plus Ethernet Shield are roughly about 60€ here in Germany. For that price you get a fully customizable ethernet platform. It is, for example, easy to implement inputs from the network. Something that I never managed to realize with printservers. Do yourself a favour: Try it. Arduino website

USB Interface

das usb-interface war urspruenglich ein geschenk fuer den vater einer freundin.
dazu gab’s ein programm, mit dem man auf knopfdruck wav-dateien abspielen konnte. von der programmierung her ein witz (weil vb und so), vom bastelaufwand auch. steckt ein no-name usb-gamepad drin, das zuerst auseinandergekloppt und dann neu zusammengesetzt wurde. war trotzdem ein lustiges geschenk. lag wohl auch an dem anderen geschenk: rotwein 🙂 hab’ dann hinterher nochmal eins fuer mich gebaut (richtig…das auf dem foto…).

edit 22.7.2006:

zwischenzeitlich hat auch mich die faszination für’s svenpanel gepackt. nun denn: hier das ganze mal mit ‘gelebter haptik’.

[tube]http://www.youtube.com/watch?v=uNK4lnncugw&feature=player_embedded[/tube]

Kartenleser

der magnetkartenleser basiert auf dem projekt MCARD aus der c’t (wann?).
das herzstück konnte ich guenstig bei ebay schiessen, den adapter für die flexleitung, mit der das ding angeschlossen ist, konnte ich als “probe fuer entwicklungen” fuer lauh beim erzeuger bekommen.

die dose ist eine butterbrotsdose, die im original (die farbe wurde durch die digicam noch ein wenig verbogen) noch viel haesslicher ist, als man aus dem foto rueckschliessen koennte.
mit dem schwarzen stufenschalter stellt man ein, welche spur der karte gelesen werden soll, der gelbe taster wirft die karte bei betaetigung aus, der kippschalter schaltet das ganze ein (aus).

ist leider nicht wirklich ueber den “cool, funktioniert”-status hinausgekommen.
habe noch einmal versucht, eine entsprechende ansteuerung in visualbasic zu schreiben, ist aber ob des sonderbaren timings im sande verlaufen (lust hatte ich auch keine wirkliche :-\ )

Pimp my Panza

waffen sind scheisse. das weiss hoffentlich jeder. nichtsdestotrotz-dem hat kollege thorsten sich ‘n ferngelenkten panzer gegönnt. na meinetwegen. allerdings hat das ganze auch etwas gutes, schliesslich hat das ding potenzial für mehr….viel mehr.

welcome to ‘pimp my panza’

es fängt -wie so oft- an mit einem fertigen (und ich meine f-e-r-t-i-g’en) haufen plastik:
panorama, deckel auf, antrieb:

nun denn… da wir ja jetzt wissen, wie so’n ding aufgebaut ist, bauen wir einen panzer nach. wir fangen -logischerweise- (?) mit den ketten an. gut ist, daß es leute gibt, die diese dinge bauen und verschicken. besser (wort!) ist, daß jedes kettenglied noch ordenlich aufgebohrt (und das ist wörtlich gemeint) werden muss. dafür haben wir eine schablone, in die jedes kettenglied einzeln eingespannt und dann bearbeitet wird:

jedes kettenglied setzt sich aus 5 teilen zusammen: 3 verbinderelemente, eine stange (=schweissdraht) und schliesslich das mittelteil

nach einer stunde…

nach zwei stunden…

nach drei stunden…

to be continued …

27.3.2006:
zwischenzeilich gab’s einen neuen motor ( ‘tmfkas’…the motor formerly known as scheibenwischermotor). diese höllenmaschine hat zwar noch keine verwendung, zieht dafür aber schon im leerlauf satte 3 ampere bei 12 volt. es hat jedenfalls gereicht, um mein netzteil (IM LEERLAAAAAAUUUUF….) ordentlich in die knie zu zwingen.


[23.11.2006]

winter is’, weiter geht’s:

das wird einmal das seitenteil (das blech meine ich- die stofftasche wird mal der turm Laughing):


und das is t-bone thorsten a.k.a. ‘doktor sprit’ a.k.a. ‘der typ, dem der panzer gehört’ mit der präzisions-stichsäge:


..und der präzisions-bandsäge…


…und dem präzisions-winkelschleifer ….


der zweck heiligt schliesslich die mittel. notfalls wird gesprengt.


immerhin…wir nehmen wenigstens keine drogen. in der zeit. also nicht viele. prinzipiell jedenfalls.

[8.4.2007]

Geht weiter- Thorsten sich erstmal ‘nen saftigen Batterie besorgt:


Wie es aussieht, wenn Thorsten Alublech zurechtverstümmelt, ist mit allergrößter Sicherheit nicht halb so interessant wie ein Satz saftige Zwischenergebnisse….Das wird….


Vom ganzen ‘rumstehen und zugucken war mir zwischenzeitlich etwas langweilig:


[12.4.2007]

Wir waren tüchtig (Thorsten sogar noch etwas tüchtiger als ich…..). Die nächsten paar Bilder kommen mal völlig undokumentiert daher:


Specter

Endlich ein neuer Dienstwagen, um die ganzen Einsätze (ihr wisst schon…Doktor-Andy…Spezialiologe und so…) auch in unwegsamen Gelände mit Stil und Eleganz zu bewältigen…


Carson Specter. Schönes Ding, wie ich finde. Da ich mittlerweile im Besitz von ungefähr 800 Sendern bin, habe ich mir dann auch gleich die Race Edition gegönnt. Der Motor stammt aus meinem alten Wagen. Dank der grandiosen Hilfe eines Vereinskollegen (‘Was weiss ich, was ich da eingestellt habe, ist auch egal, läuft ja jetzt’) macht der Motor auch keine Zicken mehr und geht mal ab wie Schmitz ihm seine Katze.


Ach, blieb er doch nur immer so sauber….


Carbon soweit das Auge reicht….angenehm


So soll’s mal aussehen. Ich hasse diesen Neon-Scheiss, den man auf den ganzen RTR-Karosserien findet. Und hier noch’n Blitz, und da noch ‘n Totenkopf und unbedingt schwarze Zickzack-Linien auf weissem Hintergrund. Würg.


Die Schablone für den Stern hat ungefähr 3 Tage benötigt. Dem ganzen wird mit ca. 20 hauchdünnen Farbschichten Respekt gezollt….Um Himmels Willen keine Lacknasen.


Zum Schluss war die weiße Dose fast leer.


Und?   Und?   Style wie’n Wholecar, wollski. (fast) fehlerfrei


Unschwer zu erkennen, daß der kleine schon unterwegs war.


Buggies haben den Nachteil, daß sie eigentlich keine Spassmodelle sind. Backflips, Wheelies und diesen ganzen Zinober wird man hiermit nur mit unfassbar viel Aufwand hinbekommen. Der Vorteil liegt aber ganz klar darin, daß man diese Dinger über eine Strecke ‘fahren’ kann (so mit…gezielt irgendwo hin). Die Stadiumtrucks und Savages sind da einfach zu schwabbelig für meinen (mittlerweile gereiften) Geschmack.

Und so sieht das dann aus.


Ganz ganz, ganz vielleicht ist der Motor noch ein bisschen fett eingestellt

Versteifungen

irgendwo hatte ich es glaube ich schon einmal gesagt. wenn nicht, dann jetzt: die dämpferbrücke am zircon (stadium truck) ist der allerletzte schund. so eine unglaubliche fehlkonstruktion sucht ihresgleichen. das problem ist, daß die seitlichen ausleger aufgrund ihrer exponierten lage bei jeder misglückten landung bodenkontakt bekommen. wenn man das gewicht des wagens mit etwa 4 kilo veranschlagt, wird schnell klar, daß bei einer landung ‘auf eck’ kein noch so dickes alu (oder sonst irgendetwas) halten kann.
da die konstruktion meiner eigenen dämpferbrücke (oben weiter) noch nicht so der bringer war und umfangreicheres momentan nicht drin ist, wurde die alte konstruktion (hoffentlich) verbessert. die vordere und die hintere brücke wurden dazu mit gewindestangen verbunden. damit das ganze zug- und druckfest ist und auch nicht bei jeder landung zusammenklappt, wurden die stangen durch rohre verstärkt. mal sehen.

und weil ich gerade ‘nen lauf (und material übrig) hatte, habe ich noch ein zwischenstück zusammengeschustert, um das ganze noch einmal gegen einknicken zu verstärken:

Motoren-Ragout

wenn man nach tagen voller sonnenschein in einer alten sandgrube faehrt (gibt es ‘neue’ sandgruben?), dann sieht der wagen irgendwann so aus:

das ist in ordnung.
NICHT in ordnung ist es, wenn dabei der luftfilter abfliegt.
VOELLIGER dreck ist es, wenn man das nicht sofort merkt *grrrr*. weil dann sieht der vergaser so aus:

man achte auf den schissel im vergaser. es ist davon auszugehen, das der sand sich auf jeden fall den weg bis ins motorinnere gebahnt hat.
also:
fahren einstellen und rauchen anfangen. danach zum dealer um’s eck und motorreiniger kaufen. dann ab in’s labor und…. seht selbst

als erstes muss die kupplungsglocke dran glauben

vergaser…noch hab’ ich die lage im griff

noch mehr vergaser. die gelebte explosionszeichnung. quasi.

und nu’ von hinten. der seilzugstarter muss natuerlich auch weg

hier kamen mir die ersten zweifel, ob der eingeschlagene weg die sache wirklich verbessern koennte; zum glueck liegt da nur das nadellager ‘rum, das aus der grundplatte des seilzugstarters geflutscht ist.

guck mal, ein pleuel. an dieser stelle hat man bei vorsichtigem drehen der kurbelwelle schon gemerkt (und gesehen), dass sandkoerner bis in den motor gekommen sind. es KANN also gar nicht mehr schlimmer werden :-\

kopp ab

backen weg, kruemmer runter

irgendwann, wenn ich auf dem rueckweg bin, muss die feder so in die kupplungsbacke eingefieselt werden

soweit, so gut (?). es ist 21:30 und ich hab’ fuer heute keine lust mehr. als naechstes muss noch die schwungscheibe runter und dann wird das ganze ding in motorreiniger gebadet…toi toi toi

mittlerweile ist die kupplungsglocke auch runter

und der zaubertrank ist angerichtet….der name ist programm, besonders bei der verwendung in geschlossenen raeumen

und ab. terpentinersatz loest dreck wie hulle und ist nebenbei auch ganz hilfreich, die ein oder andere hirnwindung durchzublasen. als der schraubstock anfing, meinen namen zu rufen, hab ich gewusst, dass es zeit fuer eine pause war.

beim umfuellen der verbrauchten pampe ist natuerlich alles – wirklich ALLES danebengelaufen

wieder zusammengebaut isser auch; keine schraube uebrig geblieben und einen schicken roten straps dran. aufauf….gefahren ist er dann auch – zumindest theoretisch. muss halt wieder neu eingestellt werden. ausserdem ist beim starten der seilzug gerissen, aber das ist eine andere geschichte …..