As some of you might already know (because I’m constantly telling you about) I occasionally do lights and visuals in a discotheque. VDMX is my tool of choice for doing visuals and I was looking for the best hardware-controller for quite a long time. Recently, someone reminded me of the Kontrol F1 by Native Instruments and after working out some quick ideas I got myself a Kontrol F1 via ebay and built a VDMX-set around it. In this post I’ll describe the setup and how things are realized.
The video shows the setup in action. The post will explain everything in detail afterwards.
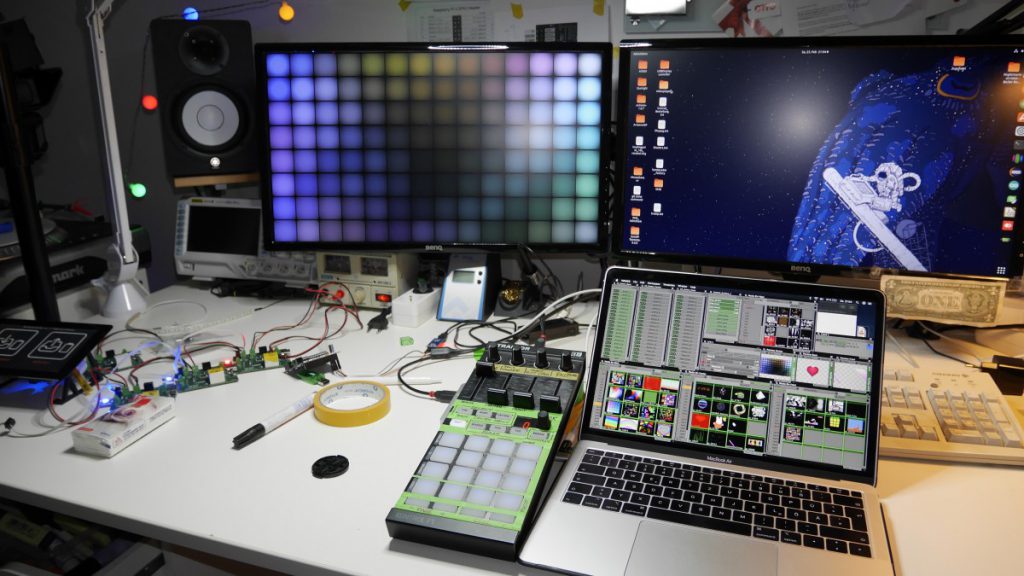
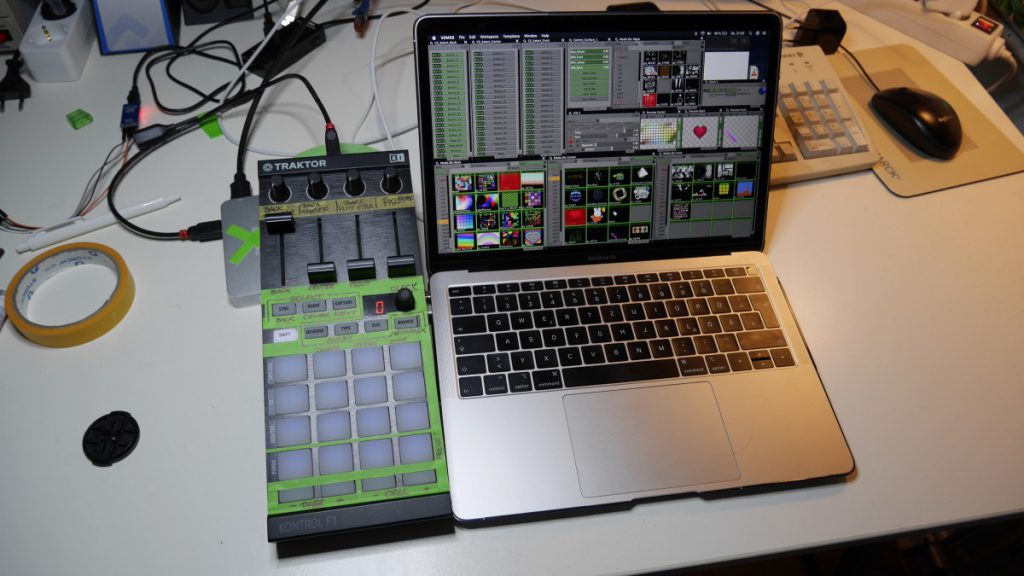
That’s the setup in all its glory. Nearly every inch of the screen is used.
When I first started doing visuals I was using Resolume 2.4 . Based on that experience I am still working with a rather simple 3-layer-setup for creating live visuals. My approach for creating visuals is also rather simple, I think. I am using only little fx and things are “simply looking nice and okay” and not too “artsy” and conceptional. Hey, we’re talking about 90’s-Parties for most of the times.
The basic layer is the background-layer and it generally features full-screen visuals without too many details. The background layer sets the main colour-mood for the next minutes.
On top of the backgorund layer resides the center layer. It generally features content that consists of single objects with different motion-patterns. The center layer allows to further define the atmosphere which is to be transported.
The front layer lies on top of them all. Most times -if used- it plays visuals that are really outstanding and flashy. Something to reinforce a break in music, etc.
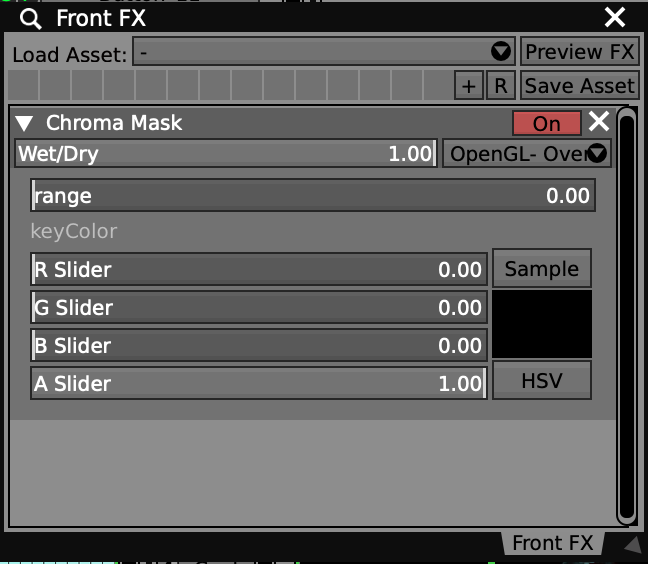
Every layer has a “Chroma Mask” effect configured with blend-mode “OpenGL- Over” attached to it. This allows me to put layers on top of each other in my desired way without having to worry about the content’s alpha-channel.
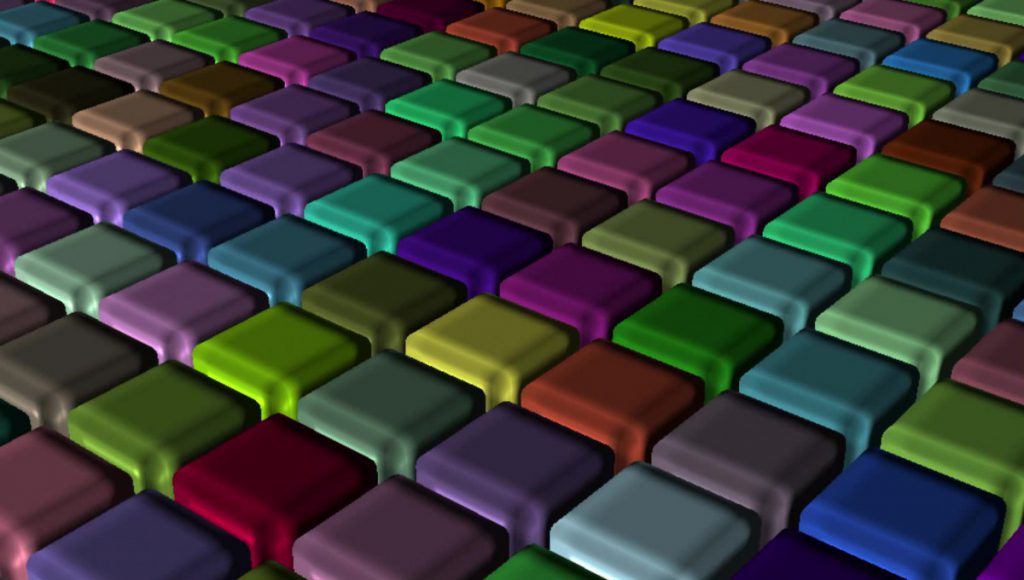
See this example for clarification: This is one possible tpye of background content.
Up next is a typical kind of center-layer content. Realize that it’s a bunny on a black – not transparent – background. A transparent background would be a sign of me completely taking care of the content’s alpha channel. But I don’t.

Having the background layer shown with opacity on 100% and fading in the center layer will either way (with or without “Alpha Mask” effect) lead to this result (the center-layer’s opacity fader is somewhere around 50%):

Not using the “Alpha Mask” effect and having the center-layer’s opacity also set to 100% will then lead to the following result. Which is technically correct – but not what I generally want to achieve.

Instead, using the “Alpha Mask” effect with rgb-sliders set to black allows me to achieve the following result. And that’s what I generally want to have. If, however, I want to only show the second layer (just the bunny with a black background) then I can simply set the background layer’s opacity to 0% and everything will be fine.

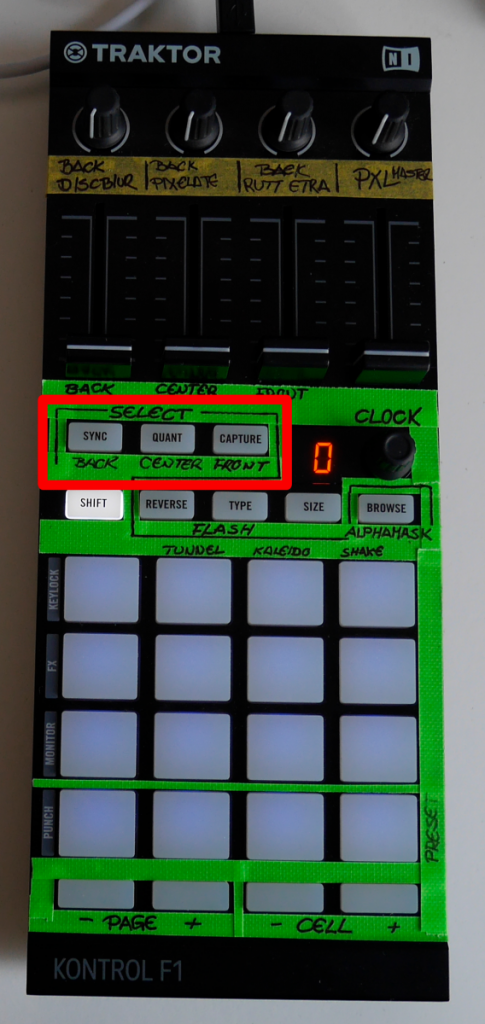
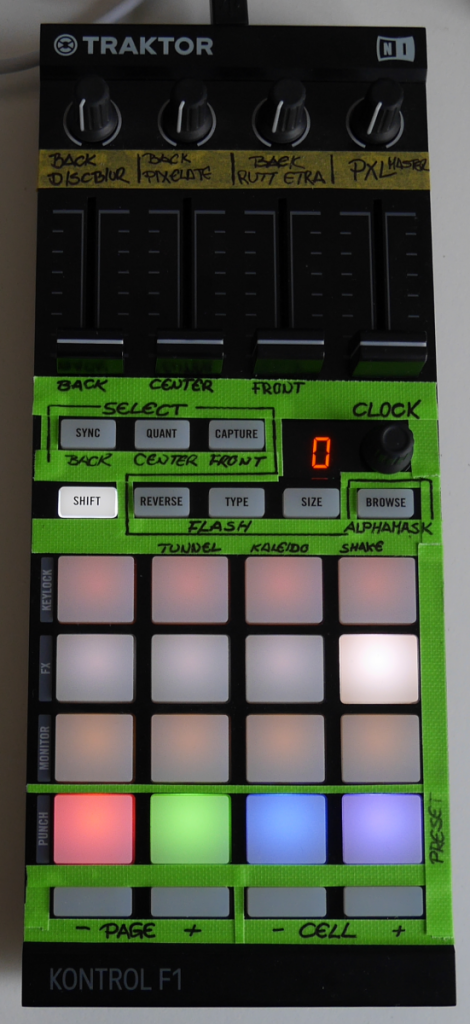
In order to make this setup completely controllable with the Kontrol F1 there are quite a few features that need to be squeezed in. Placing some labeled duct tape here and there definitely helps keeping track of all those things.
Starting with simple (and probably obvious) aspects: a layer’s opacity can be gradually controlled via the first three faders. From left to right that’s background-, center- and front-layer. The fourth fader is still unused.
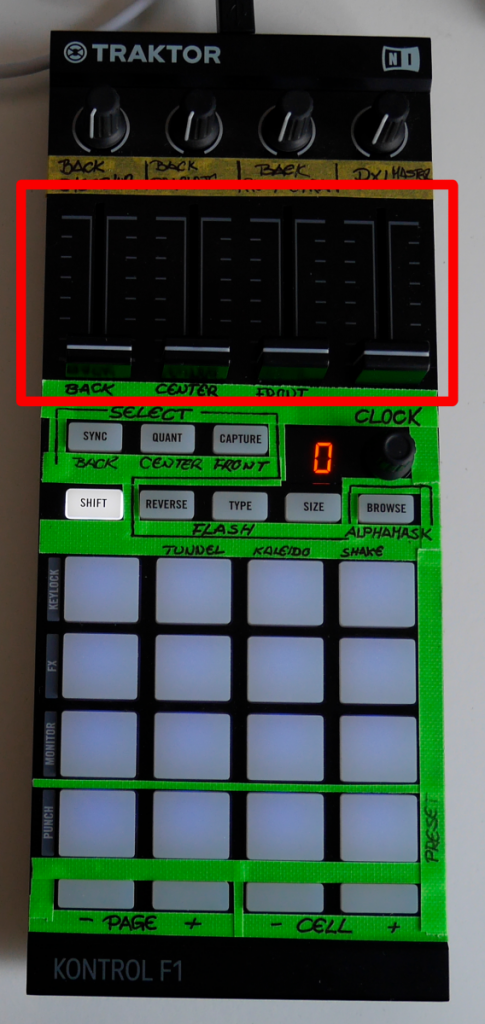
A layer’s opacity can also be controlled via the shown buttons. the buttons are configured to be momentarily active and allow a punch-in or flash-control of a layer’s opacity.
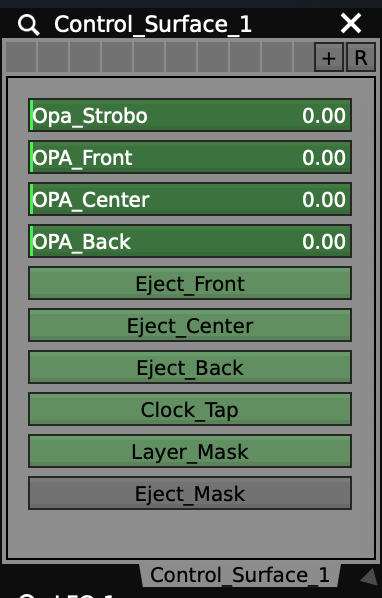
A control surface keeps track of those simple mappings. Technically this isn’t a must: the controller’s faders can directly be mapped to the layer’s opacity-control but I like to organize things this way. If anything fails I don’t have to worry about finding one of VDMX’s deeply burried control elements but can also use the mouse to control everything via a defined control surface. If you look closely you’ll realize that I didn’t completely stick to that principle, yet. Time will fix that.
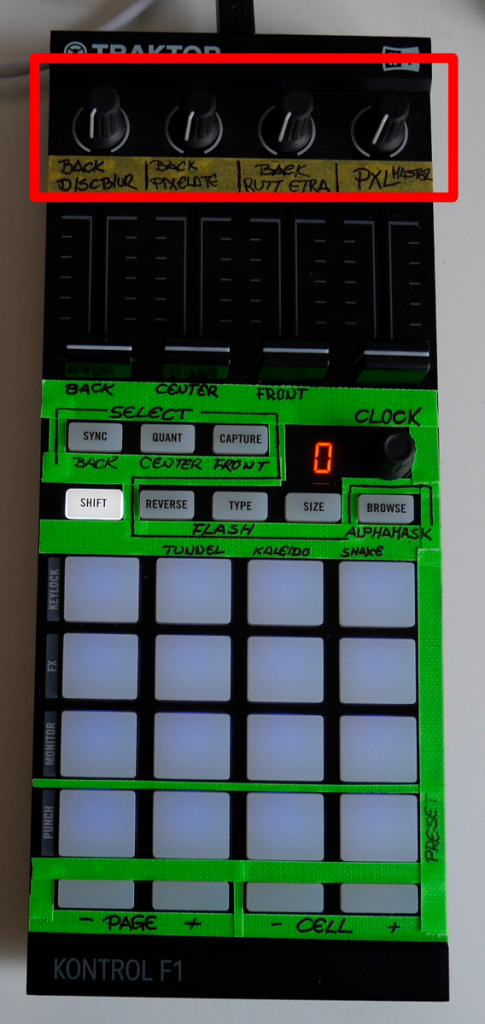
The knobs on the controller’s very top are connected to various fx. The first three knobs / fx only affect the background layer, the last knob affects the complete output. It’s only ‘blur’ and ‘pixelate’ and a mild ‘rutt-etra’ as the most extreme effect.
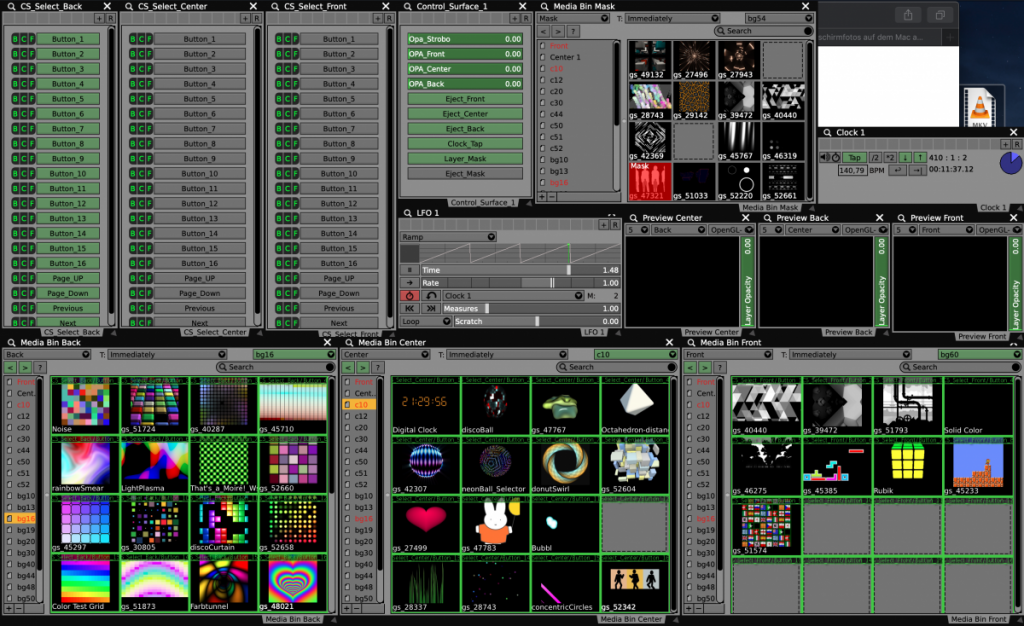
Things now become a little more tricky. VDMX organizes media in so called media-bins which can widely be configured. Having a controller at hand that prominently features a 4×4 button-matrix it’s only sensible to reflect this within the VDMX-set. That’s why there are three separate media bins. Each media bin is hardwired to a certain layer: any piece of content that is selected in “Media Bin Back” will alway play on the background layer.
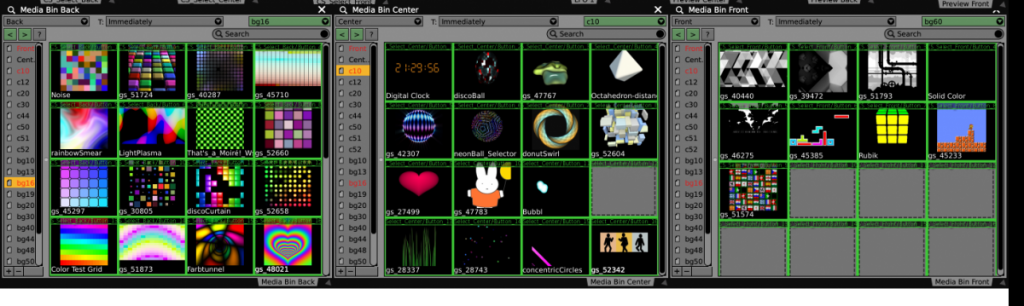
The content is organized in multiple pages; each page features 16 cells that can be selected via the controller’s buttons. There are dedicated pages for background-, center- and front-layer content. Technically, every media bin can show every content-page and content from every page can be shown on every layer. The “media bin back” is not limited to only showing background footage. It simply turned out to be a good idea to have things losely organized that way.

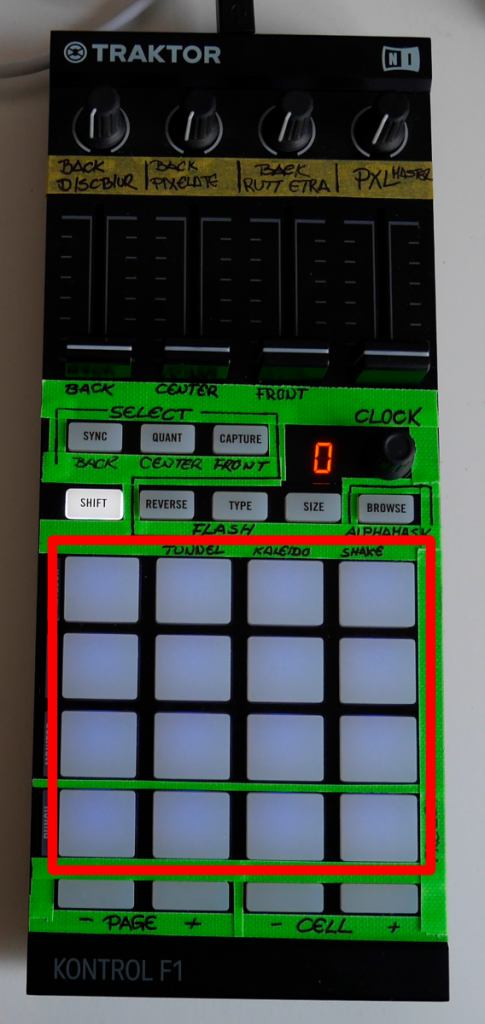
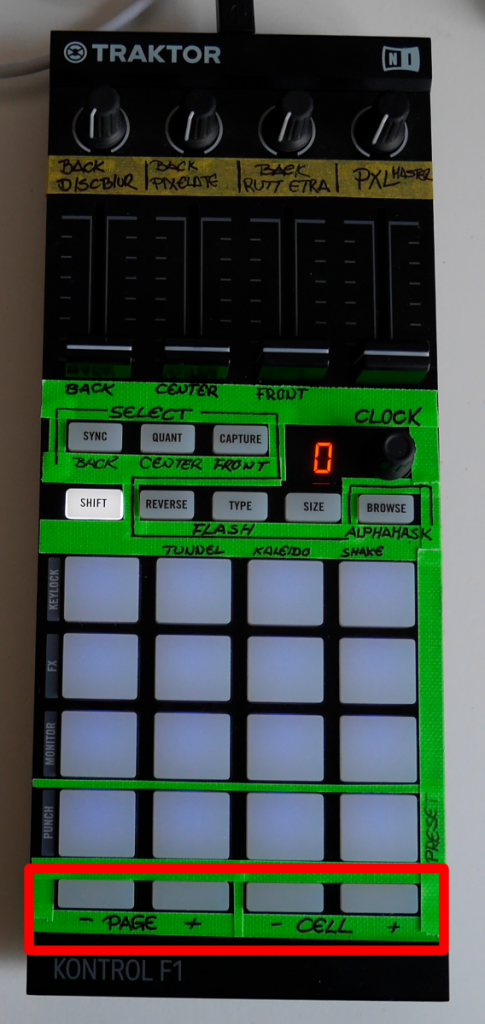
The buttons on the bottom end of the controller allow me to navigate between the different pages. The left two buttons switch between pages, the buttons on the right “Cell – / +”can be used to flick through the 16 visuals of the active page.
The next part of the setup will probably lead to MASSIVE confusions. Once in real-life when working with it as well as right now trying to explain. Maybe I’ll have to rework certain details of this but for the moment it feels okay.
As mentioned, the setup consists of 3 layers. In oder to control every layer’s visuals with only a limited number of buttons I had to implement those layers in the controller’s mapping as well. The buttons that are originally labeled “Sync”, “Quant” and “Capture” are used to select the video layer that is affected by the 16 buttons.
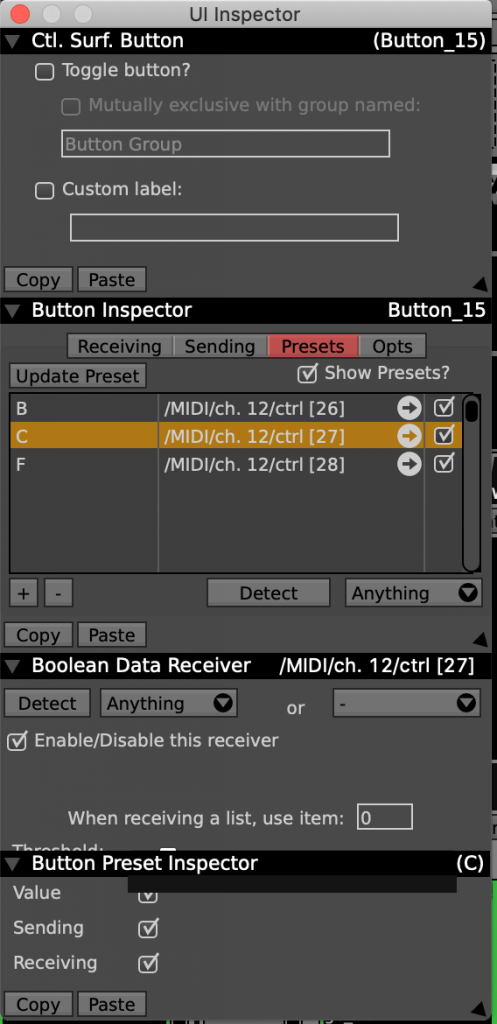
Technically, this is realized with VDMX’s control surfaces and a bunch of local presets for each control surface. It creates an indirect MIDI-mapping: the hardware-controller’s MIDI-outputs are mapped to the buttons of a control surface. The control surface’s buttons are internally mapped to a cell of the corresponding media bin. Every media bin has a dedicated control surface that controls the selection of content, switching pages, etc. .
In VDMX a preset enables a conditional many-to-one mapping. If, for example, you want to map a MIDI-input from a controller to a control surface’s button depending on a certain condition, but want to have that button mapped to a completely different MIDI-input in another scenario than you would do this with presets. Presets allow you to realize an XOR mapping. If you simply want to map multiple MIDI-inputs to the same button regardless of the situation (which would be a simple OR construction) than you can do this as well but simply don’t need presets.
In my scenario every control surface has 3 presets: B (back), C (center) and F (front). Pressing the “Sync”-button on the controller (i.e. telling the setup to use the controller’s input for controlling the background layer) selects every control surface’s individual “B”-preset (presets can be MIDI-mapped… hard to grasp but genious once you understood the concept behind it).
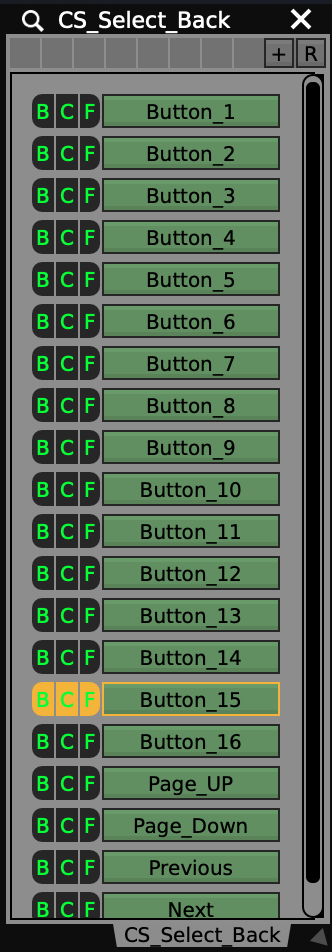
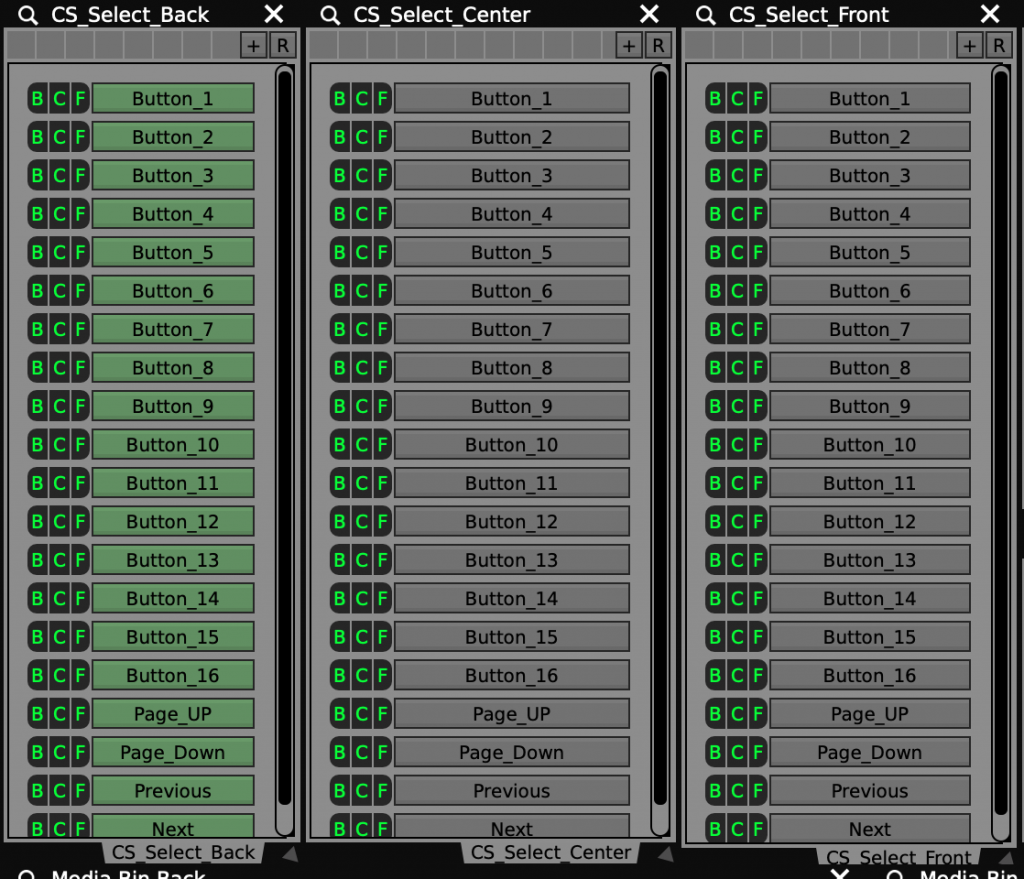
The preset “B” for control surface “CS_Select_Back” (left in picture) contains a midi mapping for the hardware-controller’s button matrix. This is indicated by the control surface’s buttons having a green colour. The presets “B” which are also triggered for “CS_Select_Center” and “CS_Select_Back” have a defined MIDI-mapping of … nothing. And that’s basically about it. the preset “C” maps “CS_Select_Center”‘s buttons to the Kontrol F1 and sets the mapping for “CS_Select_Back” and -“_Front” to a defined “nothing”.
The image shows the connection of every cell to a certain button of the correlating control surface – a green frame with the name of the mapped button. Notice how the mapping is connected to the cells, not to the content. If content is reorganized than the mapping is still kept to the cell.
Another feature of the setup is a mapping of the Kontrol F1’s rotary encoder to VDMX’s clock plugin. Pressing the encoder allows me to tempo-tap the clock, twisting the encoder allows me to fine-tune the internal clock. Though I don’t think I’ll ever need a perfectly-timed kind of anything it’s just something that i thought was a logical thing to implement.

The Kontrol F1 features a second page which can be accessed via the “Shift” button. the way the controller starts-up, behaves, how the buttons are coloured etc. can all be configured via Native Insturment’s Controller Editor. When the Kontrol F1 is switched to the second page every button, fader, knob, etc can be configured to output different MIDI-data.
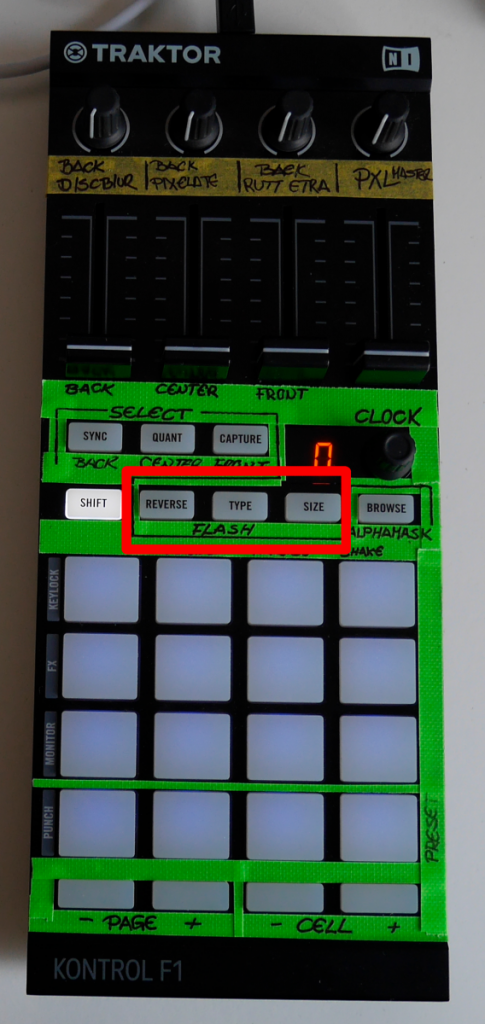
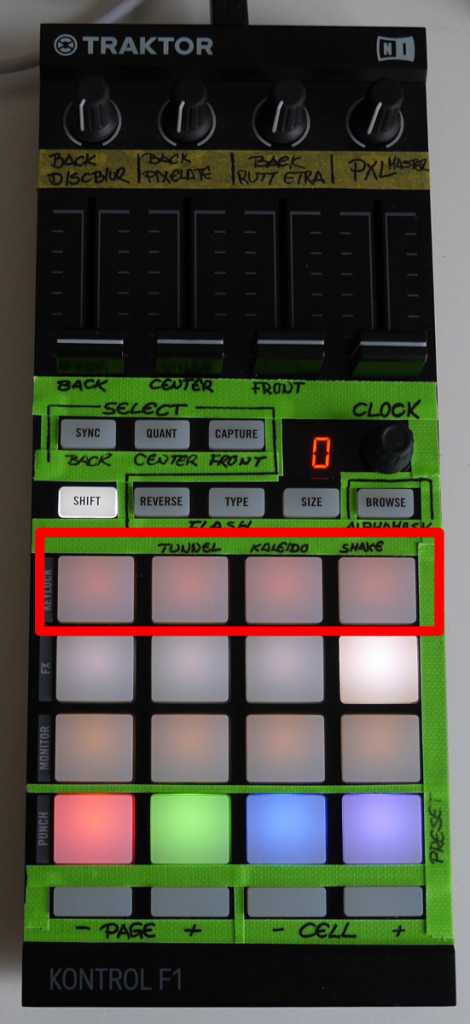
The setup heavily profits from this feature: being on the second page, the buttons “Sync”, “Quant” and “Capture” which were previsouly used to select the layer controlled by the controller now allow me to eject a layer’s media. Working on a completely under-dimensioned macbook air this is definitely necessary to have. A layer produces CPU load no matter if it’s shown or not. Heavy content on every layer definitely leads to a stuttering playback.
The second page of the controller also makes way for accessing 4 punch-in effects that affect the master playback. The Tunnel-effect (third from the right) is connected to an LFO which, in turn, is connected to VDMX’s clock plugin. This effect can be beatmatched. The white-lit button below the top row of buttons punches in a white strobe on top of everything. this is realized via a dedicated layer that has just that content loaded and no media bin connected.
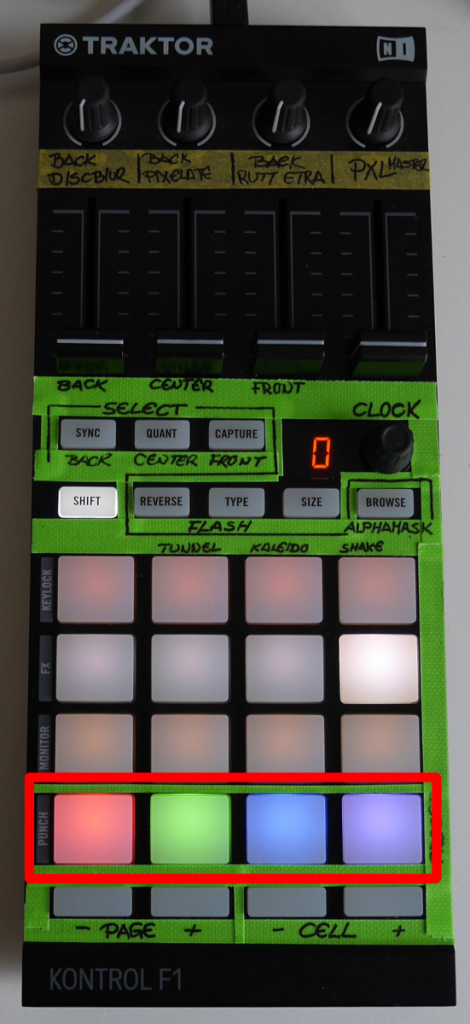
The four buttons on the bottom are not done yet but will later allow me to trigger pre-made global presets within VDMX. A global preset can best be described as something like a ‘scene’: a predefined setting of content, opacity-settings, fx. etc. that affects the complete VDMX set. So if I have built up a certain compostion and am mashing hard on the punch-in fx, strobe, etc. than it will allow me to instantly switch to a new visual composition if a song has a sudden end, etc.


Amazing work, thank you for show us all the complex setting step by step, i thinking to use the F1 too with VDMX
You have great experiments and content in your web!