Suchergebnisse für: drum

Wallace

[Somewhere around 2007]

musik is okay. die ganze sache wabert schon seit etwa 1,5 jahren in unseren köpfen herum, scheiterte aber eigentlich immer daran, daß wir zur umsetzung unserer ideen schlichtweg zu betrunken waren. mittlerweile steckt aber schon ein nennenswerter geldbetrag in der vorbereitung (bei mir zumindest). ausserdem ist es winter und… egal. los geht’s.

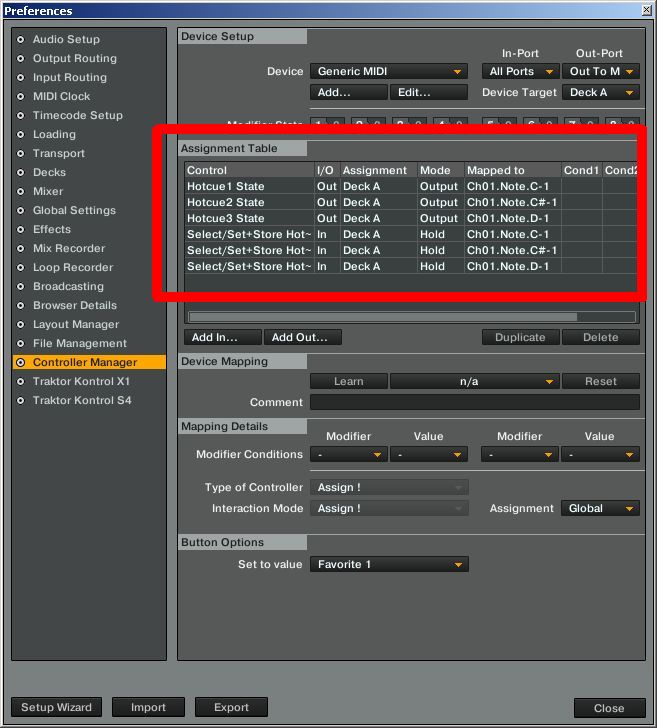
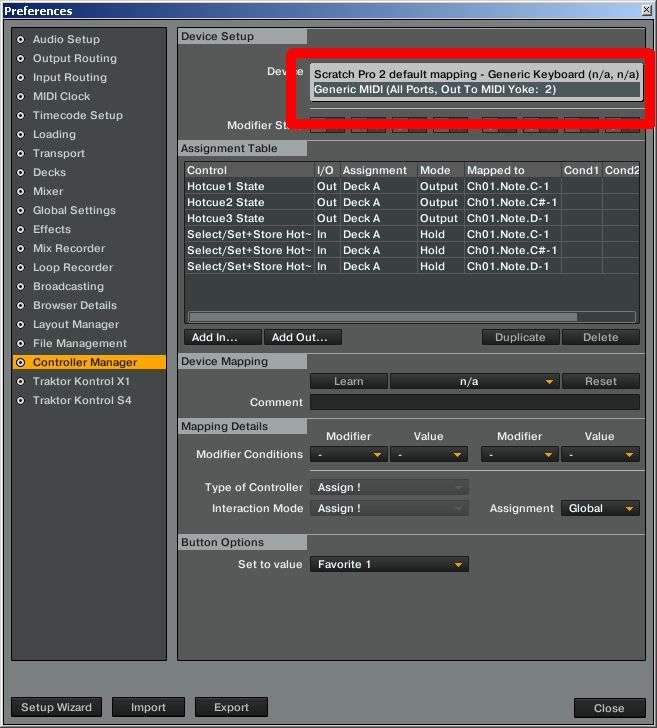
die erste ‘probe’ war eigentlich keine probe sondern erstmal ein treffen, um die technik halbwegs voreinander zu bauen. synchronisation externer geräte per midi, passiges aufstellen der teile u.s.w. ist zwar prinzipiell nicht unmöglich, muss man aber mal gemacht haben.

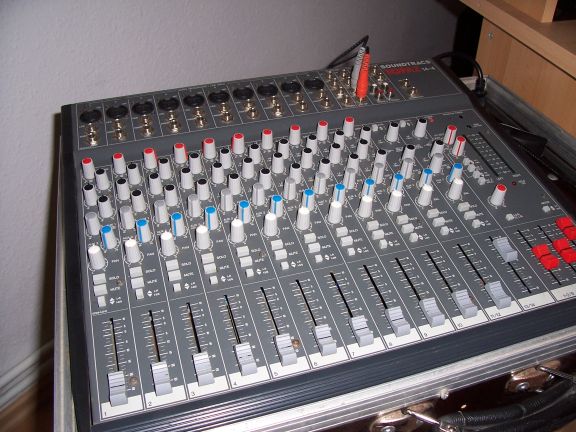
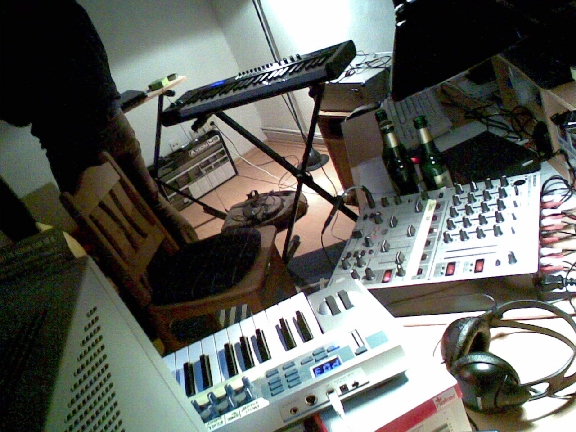
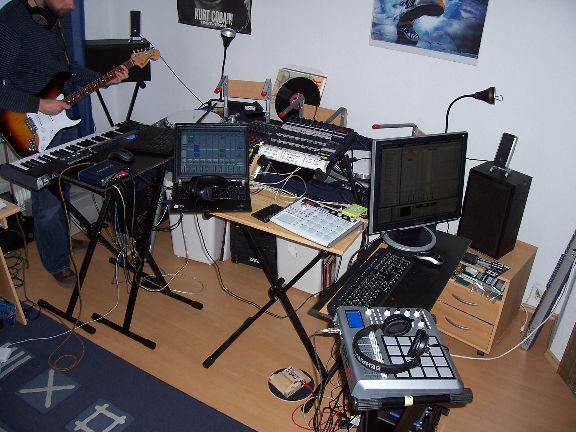
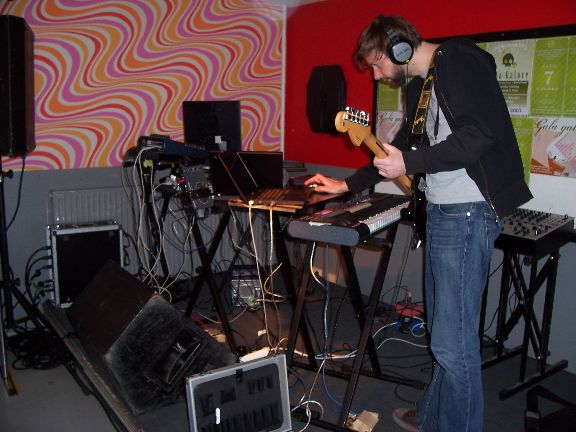
momentaner stand ist, daß wir 2 rechner (beide mit ableton live), 2 keyboards, 1 drumset, ‘ne elektrische gitarre einen bass, ein sofa mit sensoren und unglaublich viel blink-kram und gedöhns mehr oder weniger präzise zusammen spielen wollen. mit live improvisation an den rechnern (damit keiner sagen kann “eyh techno is’ ja nur musik auf knopfdruck”). wird übrigens kein techno. wir werden später in interviews sagen, daß man unsere musik nicht in eine schublade einordnen kann….

Wink

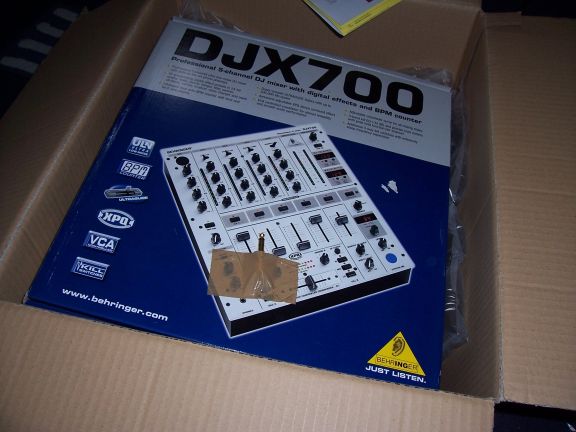
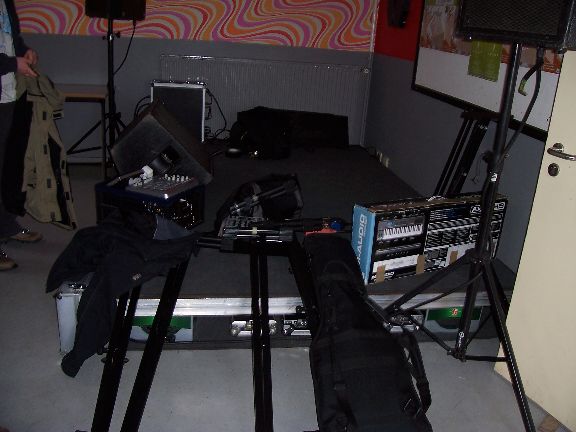
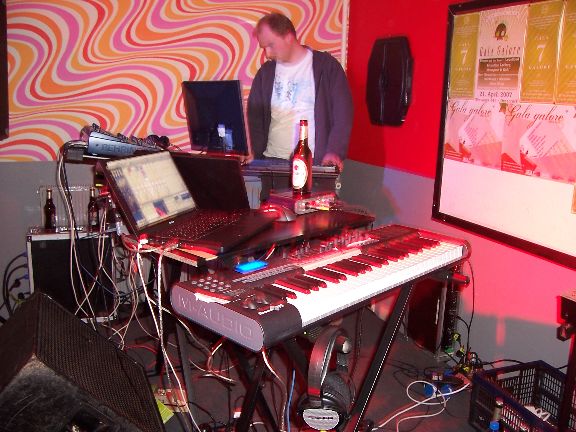
weil ich beim bestellen gepennt habe, kommt das mischpult erst nächste woche, also von meinem kumpel shimon leihweise diesen kawenzmann bekommen:


beim bugsieren mit dem monster den rücken verkantet, ‘ne macke in den türrahmen gehauen, aufgebaut. alles klar. gerade fertig, klingelt’s an der tür………


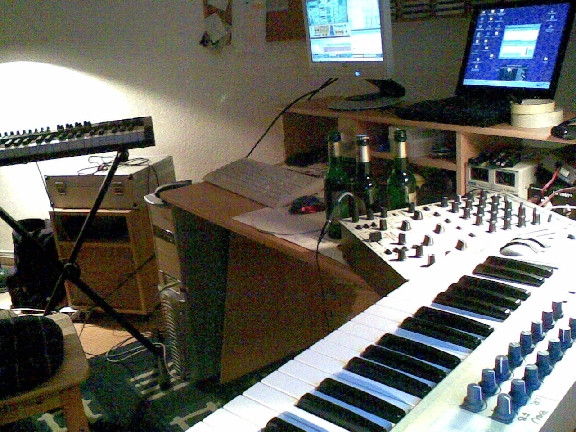
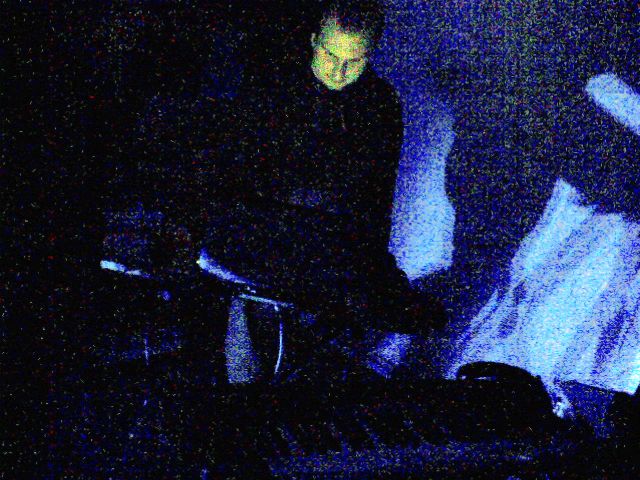
guter tag. erst die sache mit dem prinzen und dann der fee-sau voll eins reingewürgt. und nachdem wir drei stunden aufgebaut haben, kam das dabei heraus:


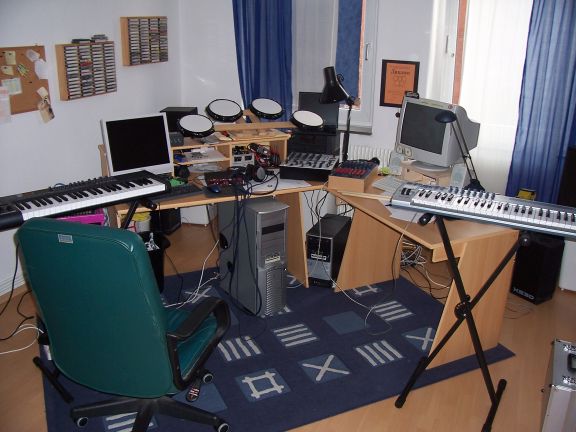
voller erfolg: kein kurzschluss, kaum software- oder rechnerabstürze, alles irgendwie so, wie wir uns das vorgestellt hatten. die keyboardständer von musik produktiv sind übrigens unschlagbar günstig, stinken aber arg derbst nach altöl. jawohl.

wir warten jetzt mal einfach ab, was da noch so auf uns zukommt…….


[3.12.2006]

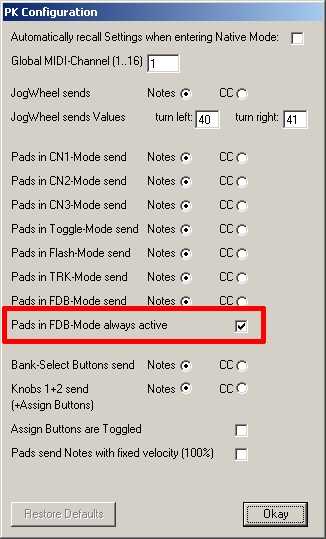
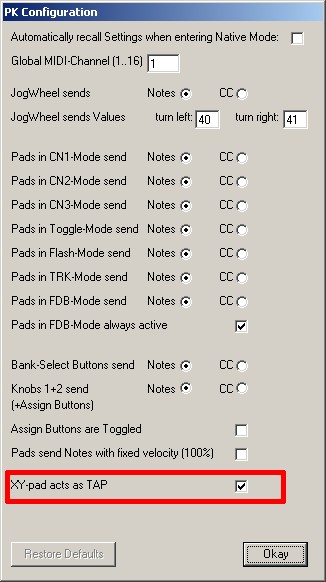
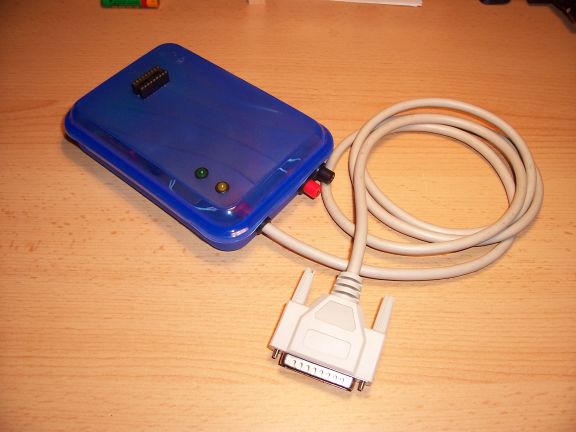
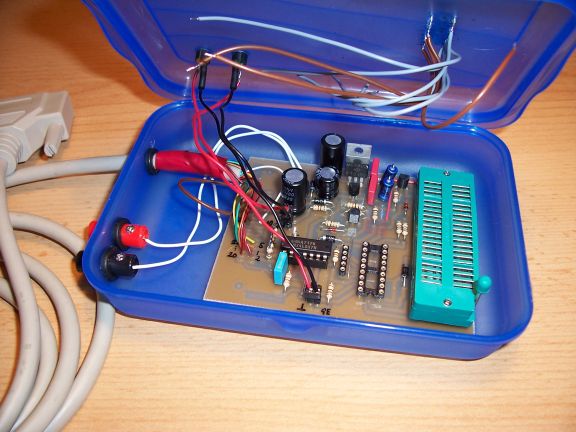
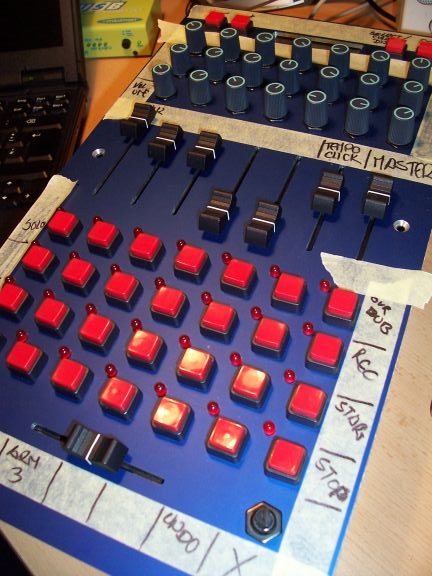
so. nach all den jahren kommt die midibox nun endlich zu ehren. das sind die tags für mein ableton-live setup….manno, wurde aber auch wirklich zeit:


[21.1.2007]

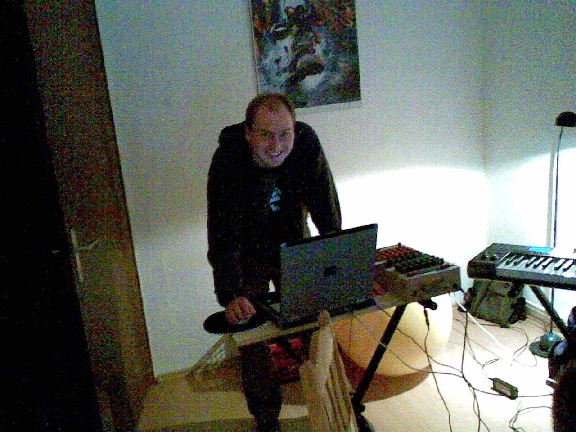
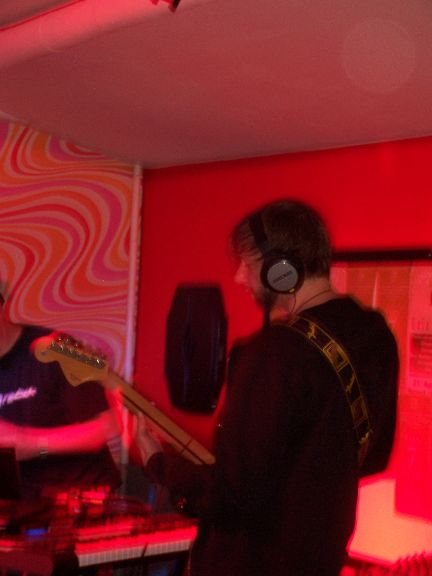
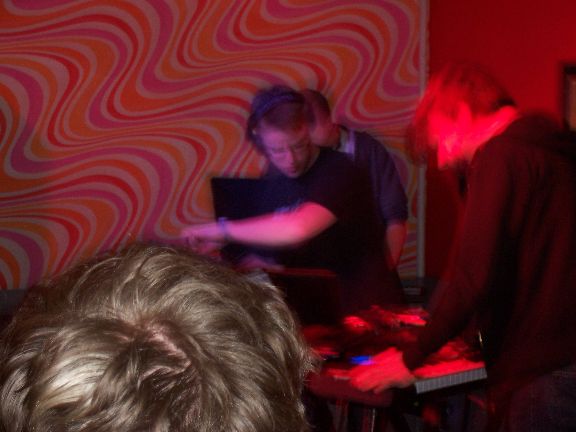
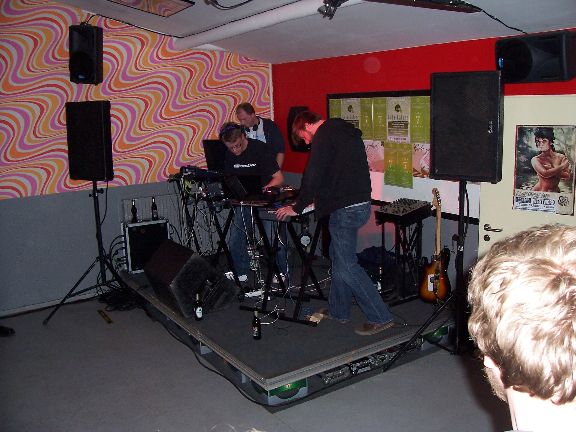
Gestern war schon endlich wieder Bandprobe. In Ermangelung meiner Kamera, die einem wahnsinnig kompliziert zu schildernden MANN…SIE IST EINFACH NICHT DA….. haben wir einen Satz höchstspektakulärer Handyfotos gemacht. In Wahrheit war es natürlich alles viel heimeliger, als die Fotos es vermuten lassen.


Um “zuwenig Equippment” oder “Nich’ genug Bier an’ Start” müssen wir uns vorerst jedenfalls keine Sorgen machen. Der Raum ist voll mit Gedöhns.


Der ‘neue’.


Geilerweise haben wir ALLES mitgeschnitten.

Dummerweise ist der ganze Kram völlig übersteuert Undecided, heisst: auf die ersten Takes werdet Ihr noch etwas warten müssen. In zwei Wochen geht’s weiter. Daumendrücken, bitte.

[3.2.2007]

Ladies and Gentlemen…das erste Dokument unseres Schaffens.

In Ermangelung eines Aufnahmegerätes haben wir zwischenzeitlich die Lautsprecherboxen mit der Digicam gefilmt. Qualitativ zweifelhaftes Verfahren aber allemal besser als die völlig übersteuerte Nummer vom letzten mal.

{mmp3}round2.swf|1.mp3&ph=30&pw=30|First Take{/mmp3}

Was Ihr hier (hoffentlich) hört ist einer der geileren Momente, die beim improvisieren entstanden sind. Von gezielter Arbeit ist noch nicht zu reden, vermutlich auch, weil wir erst zum zweiten mal in dieser Konstellation spielen….Aber da ist Raum für mehr.


P.S.: Das mit der Gitarre is’n Kracher, oder?


[4.3.2007]

Momentan haben wir einen wöchentlichen Probetermin einrichten können. Damit’s nicht so langweilig wird, habe ich von meinem Kumpel Oli dafür ‘nen Satz Floorspots besorgen können. Posen: 1+ mag ich sagen.


[15.4.2007]

Wir haben jetzt offiziell einen Namen:

Wallace.

(Also ‘Wallace’ ohne Punkt,…der beendet nur den Satz, Klar, oder?).

Und während meiner Abwesenheit (Aaabeit zieht eben aaabeit nach sich) haben die beiden Halunken in der Probe ein ganz ahnsehnliches Teil in den Raum geschraubt. Der Track hat noch Ecken und Kanten, aber so wie die beiden heute zustanden (will sagen: verkatert), ist das dennoch eine beachtliche Leistung, ist schliesslich alles live eingespielt.

Der Track heisst ’23’.

{mmp3}round2.swf|23.mp3&ph=30&pw=30|First Take{/mmp3}


[20.11.2007]

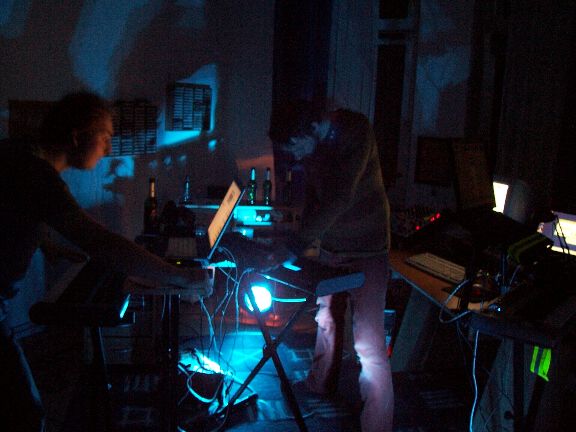
Natürlich waren wir in der Zwischenzeit alles andere als untätig. Da waren zunächst zahllose Gigs in Übersee, dazu die Backstageparty für Rockbitch etc.

Smile

Jedenfalls haben wir wieder mal etwas aufgenommen. Das folgende Teil besticht durch einen (ziemlich) geplanten Break:

{mmp3}round2.swf|break.mp3&ph=30&pw=30|First Take{/mmp3}

Und ich weiss: Du wirst sagen “Aber hey, das klingt ja garnich’ wie Scooter und überhaupt.” Richtig. Gut so.


Schliesslich geht es um den Spass an der Sache. deswegen hatten wir tierisch Bock, die Ghostbusters durch den Effektwolf zu jagen (Der Track kommt aus Ableton, die Effekte haben wir ‘Live’ dadrüber geschmissen – Ein Heidenspass). Simon hat dabei getanzt. Stimmung kommt also rüber

{mmp3}round2.swf|Ghostbusters.mp3&ph=30&pw=30|First Take{/mmp3}


der Track ist -Logo- die Titelmelodie vom Film ‘Ghostbusters’ und kommt im Original von Ray Parker Jun. Solltest du kaufen, weil’s ein großartiges Stück ist.

[19.4.2008]

Erster Auftritt!

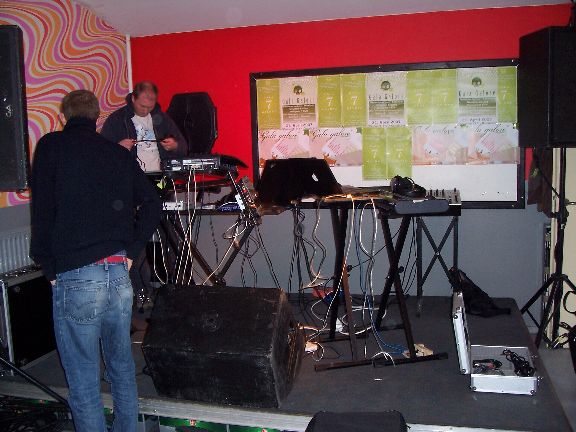
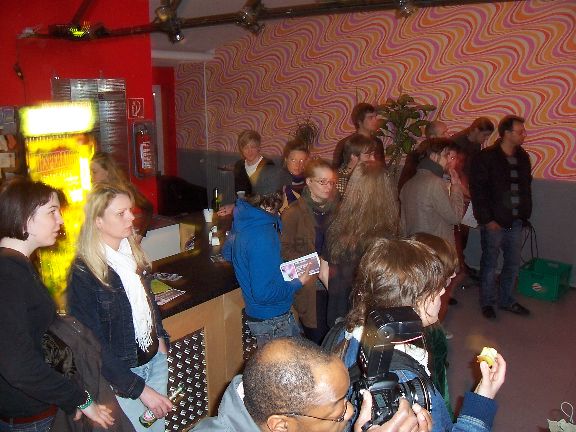
Wir durften beim diesjährigen Gala Galore spielen. Supergeil

Letze Probe:


Und dann geht’s auch schon los:


Aufbau: als erste Band hast Du den Vorteil, die ganze Bühne für Dich alleine zu haben…


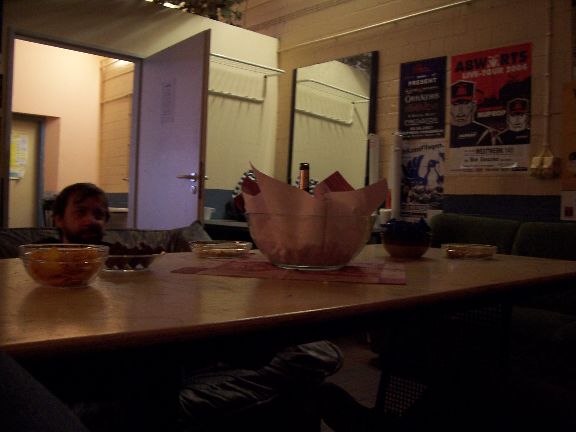
Backstage gab’s Herforder Bier. Ich wusste gleich: Dieser Tag wird gut.


Gleich geht’s los


Ganz locker mal auf die Bühne kommen und so tun, als wäre man gar nicht nervös.


Erster Auftritt, gleich vor Publikum. Geili


Erster Track (zumindest Teile davon): VintageScanner

[tube]7j_oDTGLdmw[/tube]

D’og ‘d Or

[tube]7j_oDTGLdmw[/tube]


Whaleworkers

[tube]7j_oDTGLdmw[/tube]


Und weil es ja mittlerweile unausweichlich geworden ist, gibt’s uns jetzt halt auch by MySpace. Aber so richtig froh bin ich darüber nicht. Mal ehrlich…..MySpace….welche Irren haben den Dreck denn zusammengeschustert ( Eine fehlende Überprüfung der Dateigröße VOR einem Upload ist da noch das kleinste Problem) ? Jeder, der irgendwie ‘aus dem Bereich’ kommt, MUSS die Hände überm Kopf zusammenschlagen. Benutzerführung from Hell. Das ganze Ding ist zwangsweise kostenlos, weil man für so einen dahingerotzten Müll niemanden finden kann, der bereit wäre, dafür Geld zu zahlen. Müsste eigentlich Scheisspace heissen, wär’ aber wohl zu un-web-2.0-ig. Damn!

Korg PadKontrol

Some time ago I bought Korg’s PadKontrol. The device is a sweet little Midi Controller with very sensitive touchpads. One of the better things about it is that the pads are lit when pushed. We used both Korg PadKontrol and the Akai MPD24 for making music with Ableton Live and the Korg just felt better because the Pads were way more sensible and the optical feedback just gives you that important kind of extra confidence that says: “Button hit, bro”.

The downside of the controller is the original programming of the firmware. you can -of course- send all the common Midi-stuff (Notes, CCs). But the padlights are just crap. You can configure the pads to be in ‘Flash’ or ‘Toggle’-mode but in either way the light will only flash for a fracture of a second and that’s it. Just imagine a live situation where you configured some pads as toggled and others as flashed. Even if a pad is set to ‘on’ you won’t be able to recognize that. Second best (worst?) thing is that the majority of the buttons besides the 16 main pads can only be used for configuring the device, including the JogWheel.

Fortunately  the controller (and some of Korg’s other products) supports the so called ‘Native Mode’. In that mode the Controller only sends out SysEx Messages and you can do your own processing. Furthermore you have complete control over all the elements of the controller (Jogwheel, all buttons, all the lights, …)

There are already applications out there that automatically put the Controller into Native Mode and take care about the processing of the SysEx messages but I didn’t find any of them to be easy to use or userfriendly (or Windows-Capable). At the end I am planning to use thecontroller in a live environment and I don’t want to have to mess arround with Perl-scripts or Max-patches ‘n stuff.

That’s why I built my own Windows program to put the controller into Native Mode and do some SysEx-processing afterwards. At the moment the software sends hard-wired Midi-Notes on every pad as well as the JogWheel and the knobs. There might be other possible configurations but I found this one to be rather universal.

[Update 2.3.2010]

Due to recent contributions there is a huge amount of changes being implemented. These changes mostly regard the Midi-Data being put out. The changes are documented further below.

Explanation:

the pads send notevalues depending on the selected bank. This is easy. When the JogWheel is turned to the left it will send notes ‘E2’ for 3 miliseconds (note on … wait .. note off). That’s a value which proved to be okay. When the X-Button is pressed the JogWheel will send ‘F#2’ (turning left) and G2 (turning right) note impulses for 3 miliseconds. When Knob1 is turned to the left it will send out ‘G0’ notes for 3 miliseconds; when it reached its left end position it will send a G#0 note (guessed it: for 3 miliseconds). When the ‘Roll’ Button is pressed it will not only switch the internal bank but also send out an ‘E0’ note for 5 miliseconds; this might be useful for triggering bank changes in your software or whatever. At the moment the output midichannel is hardwired to 1. The touchpad isn’t used yet.

The first half of the video shows the normal operation mode of the PadKontrol. You will realize the difference in the pad’s behaviour after it is switched into Native Mode (the moment that the controller is put into Native Mode can be identified by the change of the diplayed information from “5.01” to “GMA”.). The pads (configured as ‘Flash’-pads by default) stay lit as long as you keep them pressed.

You can easily change the configuration of any pad’s behaviour. This video shows how to configure the pads to be in Toggle-Mode. Press the ‘Scene’-button. The display will change to ‘TGL’. All the pads that are now selected will be in ‘Toggle’-mode. All the pads that are deselected will be configured as ‘Flash’ again.
What you will also realize is that the applications supports multiple ( 3 ) banks that can be selected via the ‘Roll’-, ‘Flam’- and ‘Hold’-buttons. That makes up to 48 configurable pads. Every bank’s pads can be configured independently to FLASH-, TOGGLE- or CNx- Mode (explained below). When a bank is recalled its pad’s states (on / off meaning lit / unlit) will automatically be recovered. Switching banks will not change the controller’s output (of course).

You can enter the settings at any time to change a pad’s behaviour. It won’t interfere with the controller’s output.

The second mode that I implemented is called ‘Interconnect’. You enter it by pressing the ‘Message’ button. The display will change to ‘CN1’. You can now select those pads that will be linked to each other. Explanation: when configured in the ‘CN1’-mode only one pad will light up (and send midi -out…). Every other pad configured in that same mode will be deactivated (and send a note-off value, of course. This mode might be useful when controlling Ableton’s ‘Arm Track’ or for selecting the Track you want to cue on your headphone or … .

I implemented 3 ‘CN’-modes. (CN1, CN2, CN3). They can be reached via the ‘Message’-, ‘Fixed Velocity’- and ‘Prog Change’-buttons and are independent for all three banks.

[29.11.2010] I created a new video trying to explain all this a little bit more in detail:

The software is written in VB6 and all the Midi processing is based on the Midi-Ox ActiveX-plugin and the VB6-examples that can be found on the website. You need to install Midi-Ox in order to run the program. Furthermore it’s a good idea to have Korg’s USB drivers installed. Configure the program’s I/O like shown below to have Midi-Out via MidiYoke 1. From my experience the best way to do it is to set the I/O via Midi-Ox and give it a restart.Everything should be fine then.

The output of the software is rather hard to explain. The best way is to monitor it via MidiOx’s output monitor. You can change the output data in a wide variety by accessing the config-dialog:

The settings should be rather self-explanatory (at least to me…feel free to send me an e-mail if you have any questions). All the settings are stored in the user’s branch of the registry (Windows XP) under HKEY_CURRENT_USER\Software\PadKontrol. In case you go for the tough-boy approach and manually want to alter anything there please keep in mind that the entries are case sensitive.

[Update 11.1.2011]

The program now supports MIDI feedback for the 16 pads. Inspired by User ‘Fedejair’ from the DJTechTools-Forum I updated the software so the 16 pads can be switched on and off via incoming MIDI-data being sent from Traktor or ableton or whatever software you want want to use.

In order to be able to do this you first have to add another MIDI-In-port in the configuration of my software. If, for example, you use my program to control Native Insturments’ Traktor then you’ll probably have ‘MidiYoke 1’ as the output going into Traktor. To enable MIDI feedback FROM Traktor add MidiYoke’s port number 2 as an input in my program and set Traktor to ouput MIDI data via midiyoke 2. Do NOT use MidiYoke 1 as an output towards Traktor AND as an input FROM Traktor. This will sure cause some nasty feedback behaviour.

If you’ve done this open the config-dialog and find the new button:

[…]

[Update 29.4.2011]

The feedback mode has undergone a major review and is now a lot easier to implement. Feedback mode can be configured for selected pads by accessing it via the ‘ProgChange’ Button of the PadKontrol (which makes it that the CN3-mode is gone). Just hit the button and keep it pressed. The dislay will change to ‘fdb’ which indicates that you are in the configuration for the feedback mode.

A pad which is configured for the feedback mode reacts on the incoming midi note it would send out. To explain this let’s have a look at the midi output sheet of the software:

It is read like this:

If bank number 1 is active then pad number 1 (upper left) will send out a  midi note ‘C-1’ (the first possible midi note). If this pad is configured for the feedback mode it will be lit when a ‘Note On C-1’ midi signal is received (velocity >= 63).

[Update 20.6.2012] I just discovered a little flaw in here. C-1 is a bit misleading since different tools show different values.  Anyway, it’s the lowest possible Midi note that pad #1 is reacting to. That’s shown as C-1 in Midi-Ox but it’s shown as C-2 in Ableton. If you send a note for pad #1 as a feedback to the PadKontrol and pad #9 is lit you know that you (like me) were caught by the ‘octave-trap’.

A pad in feedback mode can only be used when it is activated (lit up). Otherwise it will not send out any midi data when you press it.

In order for the software to recognize incoming midi data you have to add a midi-in port to the configuration. This might look like this:

Have a look at the ‘Open MIDI In Devices’ listbox. The PadKontrol-Ports are used for communicating with the controller itself. ‘In from Midi Yoke 2’ means that if you have a software running on your computer, let’s say Traktor 2, which sends out midi data via MidiYoke 2 then these data are received by my software.

If you look at the ‘Open MIDI Out Devices’ listbox then you’ll probably guess that my software sends midi data through MidiYoke Port 1 out to the world. That’s the port that you should configure in your receiving software (i.e. Traktor) to listen to.

This example shows the demo version of Traktor 2 together with my software. Please pay some special attention to the fact that the first song to be played has 3 hotcues (3 pads are lit) and the second one only has 2 hotcues. The pads are dynamically reactivated and can be used accordingly.

What you cannot see in the video is that all three banks of pads are supported in feedback mode. Cool thing, I’d say =)

These two screenshots show the midi configuration of Traktor for deck A to send out and react to midi data.  Of course you are not limited to Traktor at all but can use my tool with any kind of software being capable of midi in-/output.

Traktor’s midi OUT port is set to MidiYoke2 ….

[18.6.2012]

Based on suggestions made by Jan from Belgium I added this option:

It means that pads which are configured in feedback-mode always send midi data even if they are not toggled by external midi feedback. Typical usecase could be a drumtrack which visualizes the beat of your kickdrum sample (i.e. pad is blinking with the beat). This mode being active you have  the possibility to then add additional kicks by simply hitting the pad.

Furthermore there is another mode which must have been implemented quite some time ago but i totally forgot about it… TRK-Mode. You set it by pressing the “Settings/ Enter” button (lower right of the jogdial). Pads in TRK-mode are always lit. They behave like pads in FLASH-mode (TRK stands for …”tracking” or so…I don’t remember).

[1.7.2012]

When you change the banks (via ‘Roll’, ‘Flam’ or ‘Hold’ button) the bank-numer is now shown in the display for a short time. Furthermore the direction is shown in the display when you twist the jogwheel.

The PadKontrol’s XY-pad is now supported. You can either have it send out ordinary midi CC data (that’s CC126 and 127 for now) …

…OR….

You can use it as a tap button.

When this mode is active the pad will not send a continuous stream of midi CCs but only a single CC date (CC #125, value: 127) when it is hit. Due to the nature of the XY-pad this mode is not absolutely perfect but for a rough tap it’s quite cool to use.

The program can be downloaded here . I decided to give it a try and make it donationware. The program is fully functional. The only limitation is a nag-screen being shown at the program’s start.

If you want to get rid of it (or encourage me to implement new features) take your chance and have a look at my Amazon Wishlist or feel free to donate something via Paypal:

Ringblitz

Mein kumpel [stefan] ist photograph. so wie alle photographen (immer ausnahmslos, ausschliesslich) benötigt auch er einen ringblitz. hätte er sich einfach nur einen gekauft, würdest du das hier nicht lesen. also dann….

die hauptmaterialien gab es wieder einmal vom schweden.


der plan ist, die beiden halbschalen gegeneinander zu fixieren. in die große schale kommt hinten ein loch, durch das der eigentliche blitz eingeschoben wird. das hier ist der ‘kragen’ (wasweissdenichwiedasinechtheisst) für den blitz:


der passende umfang war recht schnell gemessen. dank eines leistungsfähigen computers (…) konnte ich ebenso schnell den dazu halbwegs korrekten radius schätzen. die berechnung der nötigen veränderung am radius hervorgerufen durch die krümmung der halbschale wurde mit einer nicht minder präzisen portion “sche*ssdrauf, passt schon” bestimmt. =-)


stichsäge und ab. mit den richtigen sägeblättern _fast_ kein problem

herrlich, wie sehr man merkt, was einem noch alles an werkzeug fehlt. ich benötige hier für das weitere vorankommen (endlich) definitiv eine poppnietzange. heissa.

[6.1.2007]

Ich bin endlich dazu gekommen, das Ding etwas weiter zu bearbeiten. Bei Stefan im Büro Labor Studio aufgebaut macht das ganze doch schon einen recht brauchbaren Eindruck:


Die Strippen drumherum sind zur testweisen Bestimmung des besten Abstandes gewesen. Da mein Gravitäts-Vertüddeler noch nicht fertig ist, musste das ganze hängend (im Treppenhaus vom ersten Stock aus, sah nicht wirklich professionell aus) gemacht werden. Dummerweise klappt das alles nicht so, wie wir uns das gedacht haben. Man kann zwar das gewünschte Ergebnis erzielen (mit ringförmigem Licht in der Pupille), dazu muss die zu photographierende Person sich die Apparatur allerdings INS Auge schieben. Schade.

Wir haben uns daher entschlossen, aus den Resten wenigstens noch einen ‘Beauty-Dish’ zu bauen. na immerhin.[in den nächsten Tagen geht es hier damit weiter].

Brenner 5

24.01.2006:
der drumcomputer hat zwischenzeitlich die entscheidung (= das alibi) gebracht, mir den brenner5 von sprut zu bauen. ich habe auch lange überlegt, wie ich die platine am besten baue, ob selber ätzen oder doch den irren versuch unternehmen und das ding auf lochraster aufbauen. letztlich kam die erlösung in form des elektronikladens meines vertrauens. ätzen, bohren, platine, lötlack alles incl. für 13 €uro. was soll’s – für die kohle hätte ich’s nicht selbst machen können (nein, hätte ich nicht..!).

leider scheint es die wunderbar hässlichen brotdosen, wie ich sie für den kartenleser (ganz oben) benutzt habe, nicht mehr zu geben und so muss ich auf diesen neumodischen schnickschnack ausweichen. aber gut. man geht ja schliesslich mit der zeit.

die fassung für 18-polige ic’s habe ich gleich nach außen gebaut, weil ich die vermutlich am häufigsten nutzen werde. (außerdem hab’ ich keinen bock drauf, die anderen löcher auch zu bohren :-P). 18-polige nullkraftsockel scheint es nirgends zu geben, wer eine quelle hat, möge sich bitte bei mir melden.

die dioden und die fassung im deckel sind steckbar angebracht. wer weiss, wie sich das teil nochmal entwickelt (oder ob ich nicht noch irgendwo ‘ne richtig schaurig hässliche brotdose finde)?