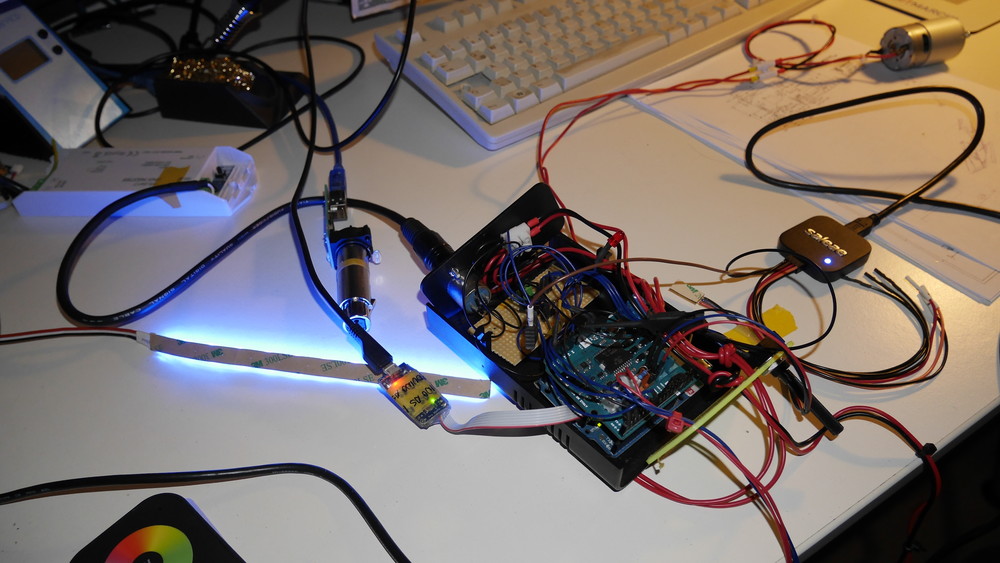
Ein Teil, das mal wieder weitaus länger, als es mir lieb war, meine Zeit in Anspruch genommen hat: Eine Steuerung für einen Motor ( EINEN MOTOR … hört ihr das … ihr … Auftraggeber ), die an eine vorhandene DMX-LED-Fernbedienungs-Dingsbums angeschlossen werden soll. (Rechts im Bild: Saleae Logic4. Hatte ich mir zum Geburtstag gewünscht. Derbes Gerät.)
Due to … massive … request I took the chance and did a major overhaul of my post about the GrandMA remote command line from a few years ago. Back in the days I pulled together a quick ‘n dirty version which somehow worked and caught some interest but never really became more than a proof of concept.
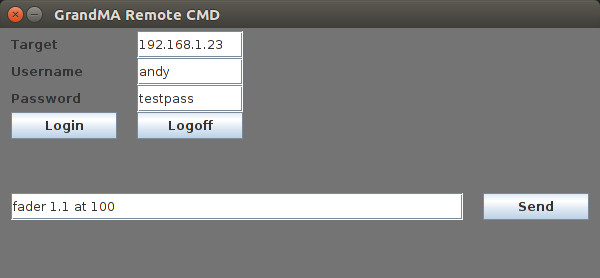
tl;dr: This program provides a remote command line to a GrandMA Version 1 lighting desk (console or onPC). Since it’s implemented in Java you can basically run it from every computer that you have at hand ( yes: even a Raspberry PI ). Having a command line proved to be quite handy especially when you are setting up a show from scratch. It is simply faster to issue the command “fader 1.1 thru 5.10 at 0” than to manually set 90 faders to zero (or -god forbid- use a mouse to do this on the onPC-version without a touchscreen).
I’m a little late on that topic: Meanwhile ( meaning: a few years ago ) the GrandMA Version 2 has been released and it incorporates a native Telnet interface. This somehow makes my version obsolete but … people asked for it and I owe it to myself, I think.
Bei der Entwicklung vom BetaTouch Client Version 1 bin ich seinerzeit ziemlich schnell an die Grenzen der Verwendeten Technologie gestoßen. Was will man machen, eine Entwicklungsumgebung, für die es damals schon seit ~15 Jahren keine Updates mehr gegeben hat, …. macht mindestens mal bei der täglichen Arbeit absolut keinen Spaß mehr. Deswegen habe ich um das Jahr 2013 (sofern ich mich richtig erinnere) damit begonnen, Eine bessere Version von Grund auf neu zu entwickeln.
Zu den gewollten Merkmalen gehörte eine möglichst große Flexibilität bei der Gestaltung der Oberfläche, einfache Erweiterbarkeit um neue Funktionen, Synchronisation via Netzwerk….. und wenn’s neben Windows auch auf Linux liefe, wäre auch nicht schlecht.
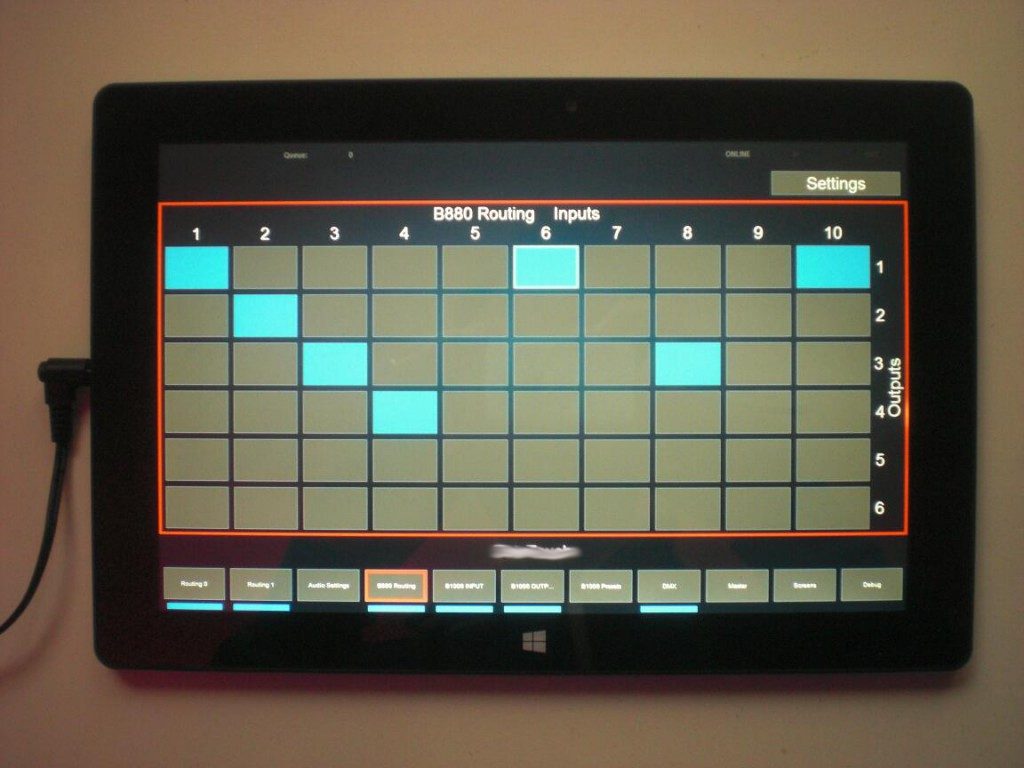
Herausgekommen ist der ΒTouch Client Version 2 ( … btw: Das ist nicht der Buchstabe ‘B’, sondern ein ‘Beta’ … #truestory ) .
Es ärgert mich übrigens maßlos, jawohl, dass ich es verpeilt habe, mit den Feldern wenigstens für das Foto irgendeine Form von ASCII-Art darzustellen. Scheibenkleister! Aber egal:
Die Software ist darauf ausgelegt, per Touchscreen bedient zu werden. Sie erlaubt die Steuerung unterschiedlichster Geräte(-kombinationen) durch nicht-geschultes Personal. Die Software eliminiert das Risiko von Fehlbedienungen und ist in der Lage, Multiroom-fähige Steuerkonzepte zu implementieren. Geräteabhängige Steuerprotokolle, Regelsätze, etc. können darüberhinaus verhältnismäßig leicht hinzugefügt werden.
Ich hab es an anderer Stelle schon einmal erwähnt: Seit mehreren Jahren arbeite ich mit Leuten an einer Lösung zur Steuerung von Geräten. Der ganze Bimmbamm hat sehr wenig bis ganz viel mit Automatisierung zu tun, geht aber an manchen Stellen darüber hinaus und ist an an verschiedenen Stellen sowieso ganz etwas anderes. Das Ding nennt sich BetaTouch.
Einer der Wege, die wir mal verfolgt haben, waren die ‘Zauberkästchen’. Daraus ist kein fertiges Produkt geworden, aber es gibt ein paar Bilder und ein wenig was zu erzählen. Hervorragend also für die Webseite.
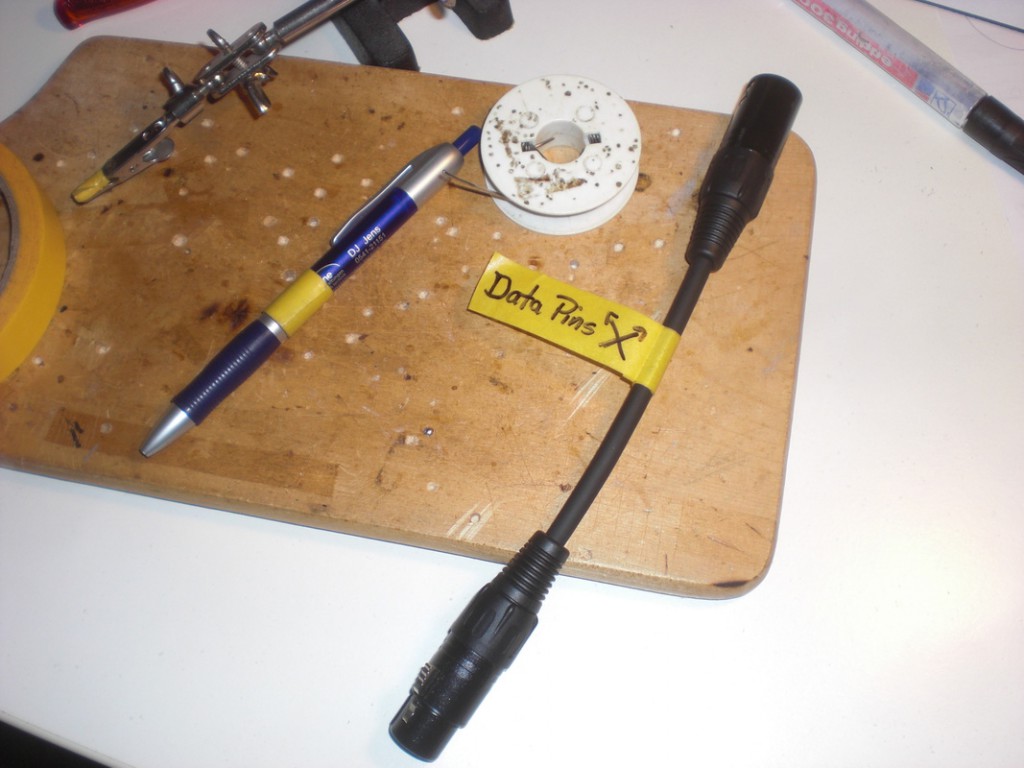
I always have some problems with starting a new post about a device I built. They always seem to begin similarly. This post, anyways, describes the actions that took place for me building a DMX-to-Kramer converter.
The operation is quite straightforward: You assign a DMX-address to the device and connect it to lighting-desk/ your DMX-infrastructure. Upon receiving certain DMX values the converter sends out data via its serial port. These data being sent out are part of Kramer’s Protocol-2000 command-stack.
This way you can control any Kramer device via DMX.
To keep operation as simple (and secure) as possible I did not implement the complete command-set of Kramer’s Protocol-2000 but only a few commands. In this example I only implemented the commands to change video-output of the Kramer device. Anything else is possible as well, of course.
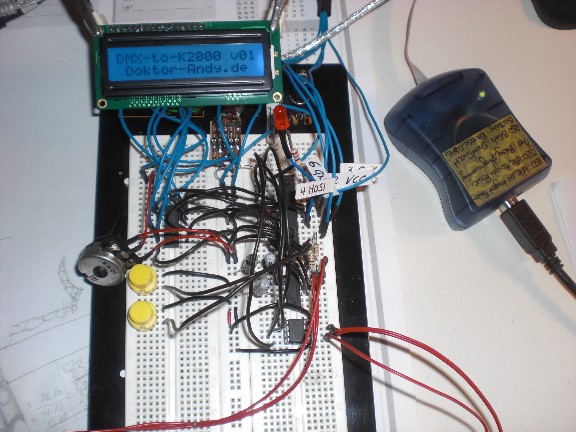
A very early prototype on a breadboard. Most important stuff (the display…) is already working.
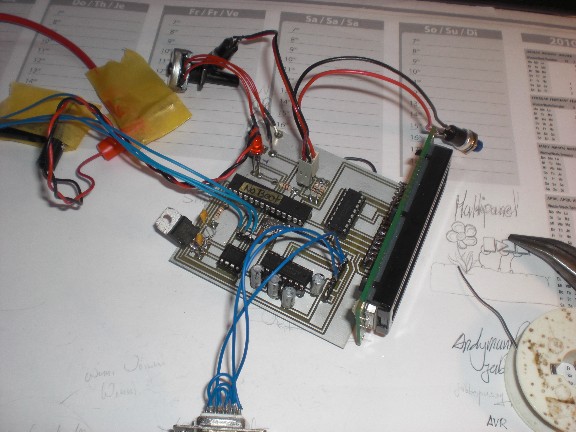
The circuitboard was developed using Fritzing. It was etched at PCBPool. I realized that I forgot to include the capacitors in the second that I unpacked the circuitboard. Afterwards it still took me ~2 hours to realize nothing was working because of those little bastards…
Duct tape and microcontrollers … Story of my life…
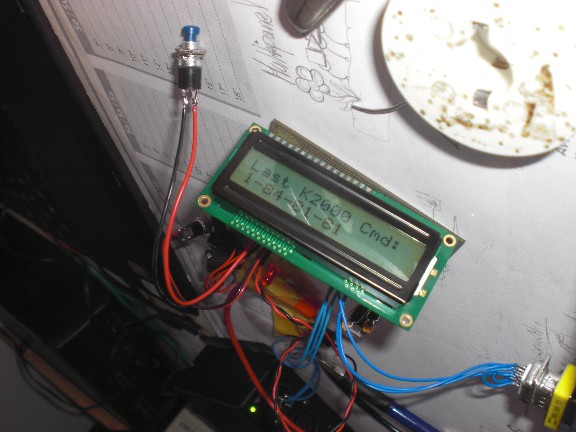
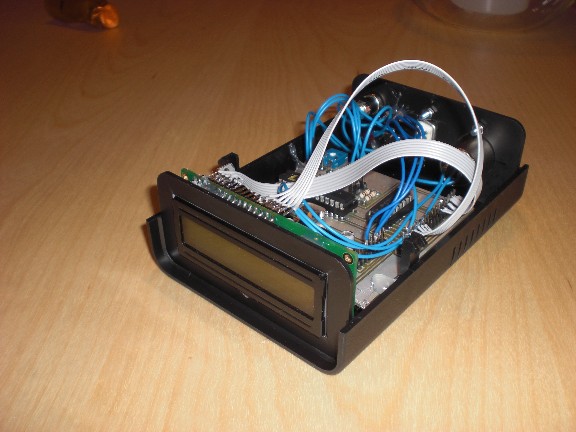
The last K2000-Protocol command is always displayed for debugging purposes.
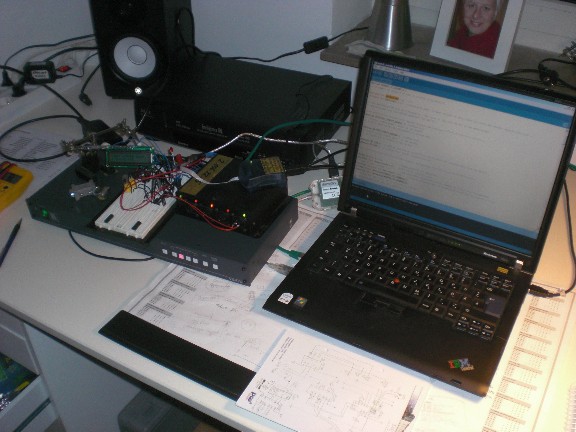
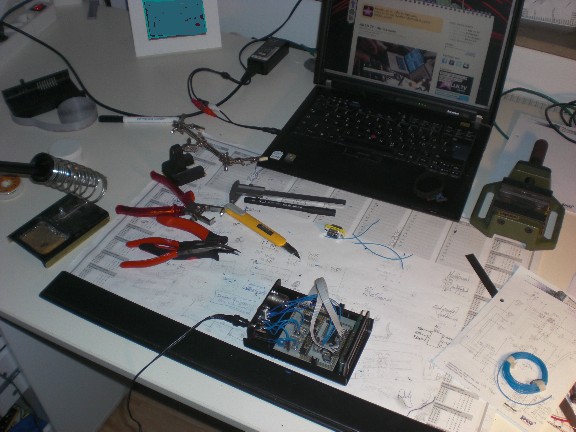
That’s what my desk looks like during those phases.
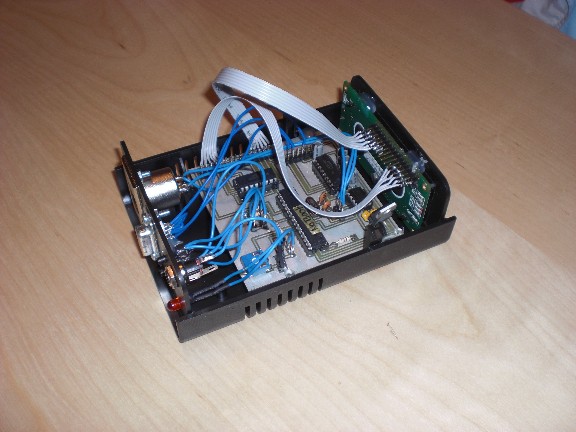
Coming close to an end…
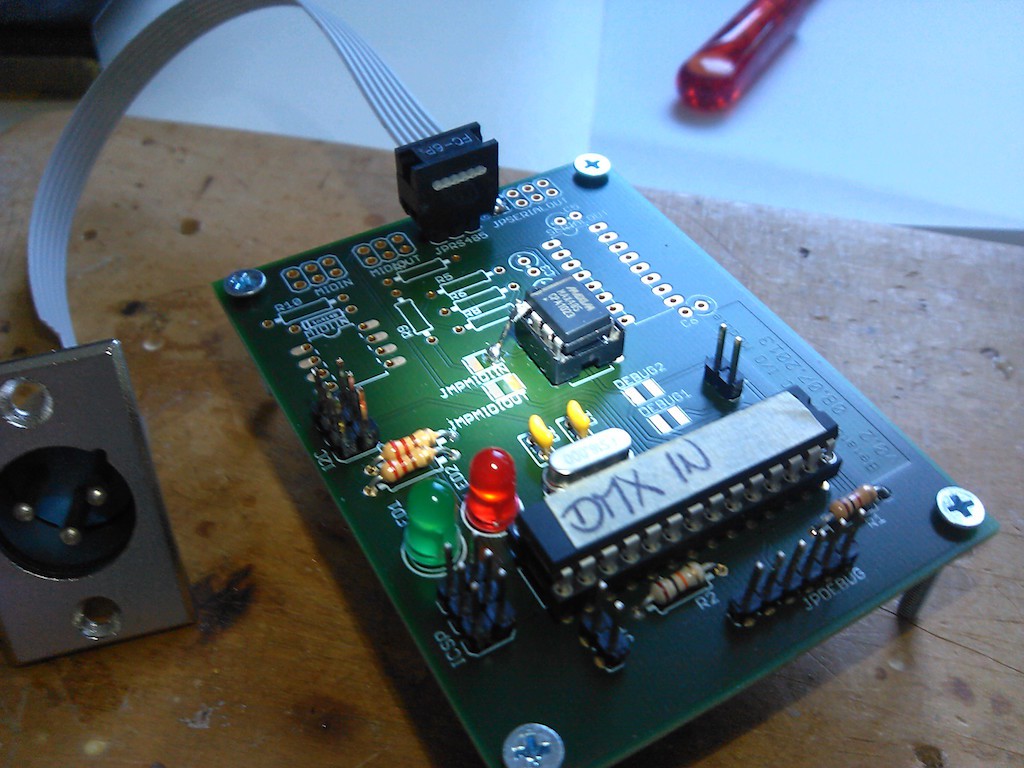
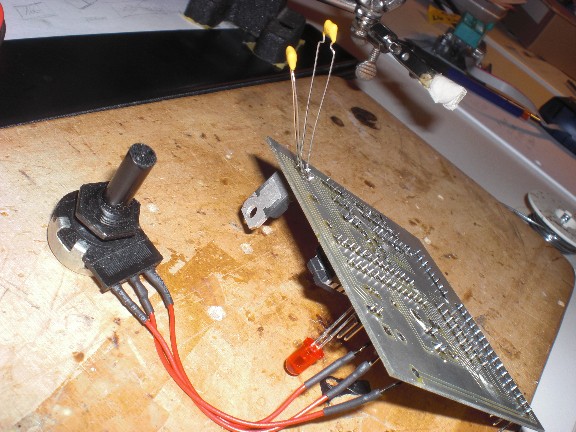
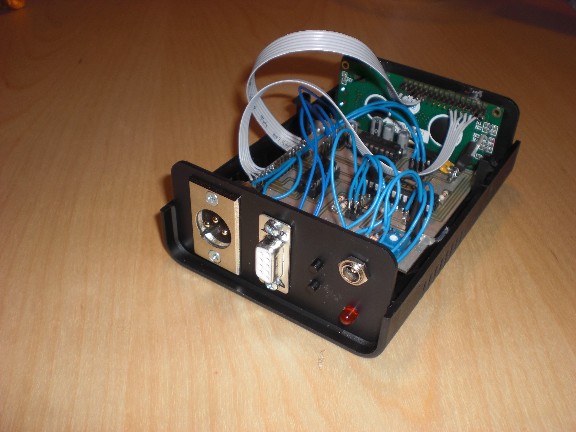
DMX-In, Serial-Out. DMX-address can esily be changed via the buttons next to the serial port. The next version will probably get some Serial-In as well.
Back side (Front side?)
As I already stated earlier I only implemented video-switching via K2000-Protocol. Switching other aspects (Audio, for example) will just be a minor change in code. It would be possible to completely implement the K2000 protocol but I don’t think this is very sensible since it would probbly increase the chance of totally messing things up during normal operation.
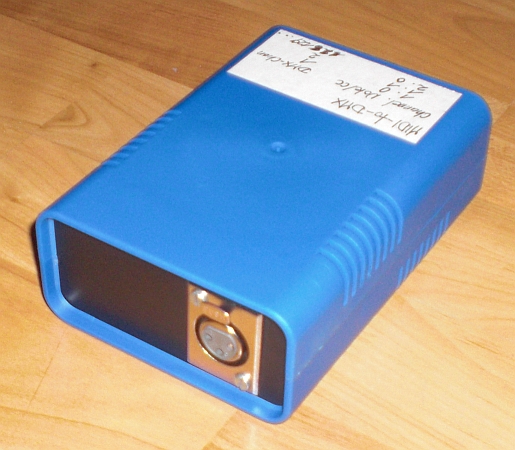
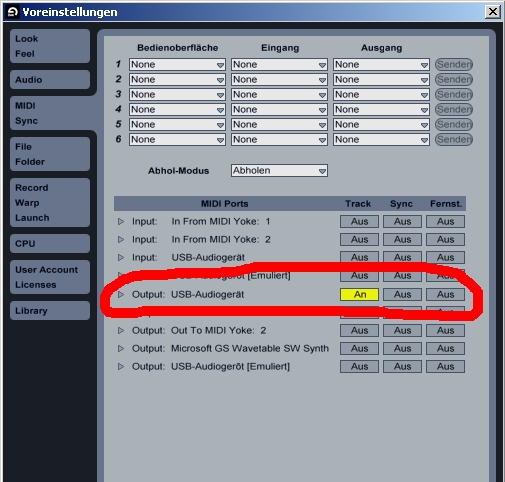
As you already might have guessed this is a simple MIDI to DMX transceiver. It’s powered via USB and doesn’t need any additional drivers. On a German Windows XP it installs itself as an ‘USB Audiogerät’.
The aim of it is to have some practical solution to control lights with Ableton (any midi sequencer). In Germany we say “AEG: Auspacken, einschalten, geht” (which is a pun based on a german company’s name and means something like “unpack, switch on, enjoy”.)
There are, of course, other ways to control your lights via a midi sequencer. You could, for example, have a dedicated midi track in ableton to send out midi to your GrandMA onPC (any lighting software). This would give you the power of your lighting desk combined with the power of your midi sequencer.
On the other hand side this might be a little bit of overkill if you just want to drive some LED pars (or it might even be impossible if you never worked with a lighting software before). Furthermore you are always using your lighting software ‘blindsided’. you can just hope your midi clip triggers the correct chaser. I know from my experience that it really takes a lot of preparation to make sure every midi clip only triggers your desired lights. Many things can (and will) go wrong. Therefore it’s easy (and fun – somehow) to quickly edit your midi clip on your light-track (or group of tracks) and instantly see the changes you made. Don’t forget: If you are using midi clips you are automatically in sync with your sequencer. No need to send an extra clock signal etc.
However, you could also think about controlling your existing hardware lighting console via true DMX. Might lead to some interesting combinations if you are having a gig in a venue with a fixed lighting structure and a lightjockey who will give you control over his desk (as if that ever happened……).
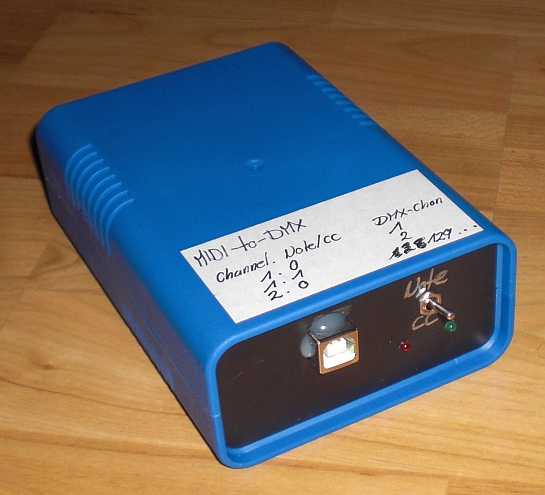
Sadomex can send out DMX-signals based on incoming midi-notes or midi-CCs. The mode can be changed during usage. The communication works one way. It’s midi IN and DMX OUT.
512 DMX channels are supported. This is achieved by using different midi channels. Midi Notes/CCs 0-127 on channel 1 represent DMX channels 1-128. Midi Note/CC 0 (the first one….however you may count) on midi channel 2 represents DMX channel 129 and so on….
Naturally, the resolution is only half as precise as native DMX since midi only supports a range of 128 values and DMX supports 256. There could be different workarounds but that would only make it more complicated. This way, a midi note’s velocity of 127 (full) represents a DMX channel’s value if 255.
This video shows the device in action with an LED Par lamp. Notice how the lights stay in sync with the metronome:
This is how you configure Ableton to talk to Sadomex. In this scenario the first 128 DMX channels can be addressed due to the output channel being set to 1. If you would like to control a fixture with a start-address greater than 128 (and smaller than 256) you would set the output channel to 2. Realize Ableton’s possibilities to group tracks. This way vou could control a whole bunch of fixtures as if they were midi clips. The clips in the screenshot, by the way, are those from the video above.
A demo file for Ableton 8.2 can be downloaded here . It shows some basic patterns for controlling an RGB LED Par at DMX address 10.
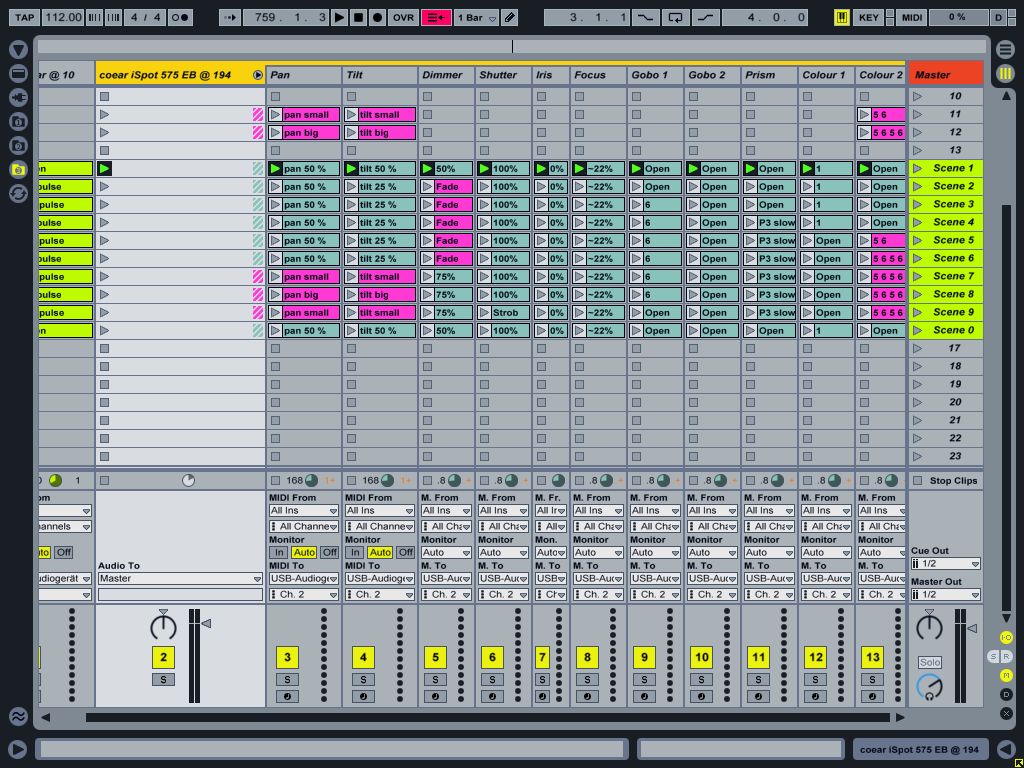
I put together another example which is a little more complex. This one controls a Coemar iSpot 575 EB with a base address of 194. Notice how the output midi-channel of the iSpot’s tracks is set two ‘2’ in order to reach DMX-address 194. The pinkish coloured clips are chasers (e.g. continuously change colourwheel 2 between colour 5 and 6) whereas the blueish-green ones represent static values (gobowheel 1 set to ‘open’).
This is all done with Sadomex being in ‘Note’ mode (reacting to Midi notes and their respective velocity values…).In my eyes, Ableton’s workflow is not quite optimized for easily creating CC curves for this special scenario. Maybe it’s easy to achieve in-sync CC curves/values with other sequencers.
It surely IS a pain in the back to put together pan/tilt motion with midi notes. Furthermore you are really bound to a certain tempo when it comes to pan / tilt motion (a smooth tilt wave at 112 bpm like shown in the example won’t look as smooth at 65 bpm without being altered to a high degree). On the other hand side it’s fun thinking about what you might be able to do with things like Ableton’s built in Midi Effects like Velocity, etc….
This time it’s being controlled via Akai’s APC20 which makes it even more fun.
Due to my 1337 computer skillz (not) it was absolutely impossible for me to convert my video -with- audio. If you look carefully you see the LED Par from the previous example in the bottom of the movie. It’s flashing in sync. At least you can get an idea of what it’s all about:
I’m not quite sure how to proceed with this right now. At the moment (october 2010) all my resources are tied to other things. Maybe I’m going to build a few ones when there is time and sell or swap them. Contact me if you are interested in a unit or if you have any questions regarding the device.
[Update 31.10.2010]
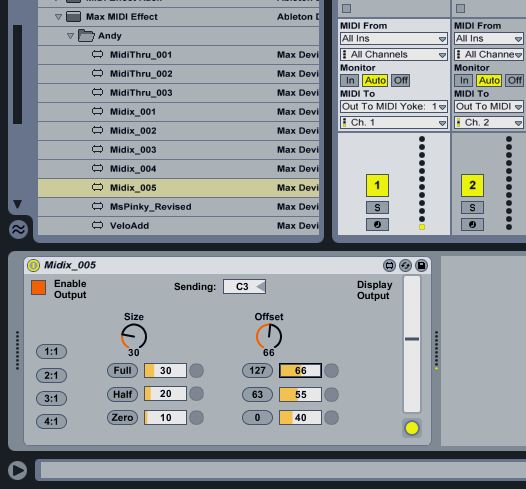
Oh Ableton how much I adore love like you! After playing with the above setup for a time I was not really confident with Ableton’s native possibilities for live-editing the Midi (i.e. DMX) output. For example: It’s a quite common task to make a moving head point to a certain position and make it do its motion arround this position then. This can basically all be done by simple note-to-dmx conversion but it’s not as dynamically assignable and easy to do like you would with your dedicated lighting-controller (I guess you know I’m talking ’bout GrandMA…….). That’s why I had a look at Max 4 Live. Fortunately I have been tinkering with PureData before so the start was not that complicated for me. What came out is a nice little MAX midi effect doing all the necessary processing within one device:
(I later realized that what I built is nothing more than an ordinary MIDI-lfo.) What the effect does is that it creates a sine-envelope for the velocity values of the incoming notes (those notes which are played in the active clip). Since everything is midi-assignable the amplitude of the sine (= the size of the effect) and the offset (= the position the head is moving around) can either be selected from fixed and user-configurable presets or they can directly be controlled by a knob or a fader (assigned to the dials in the screenshot). The sine’s periodicity (=fixed multiples of the motion’s velocity) can be selected from four presets as well.
(Yes…you surely Do have to look a little bit careful to locate the mouse and its actions in the lower left corner of Ableton…)
See how the Pan/ Tilt positions can be selected by triggering one of the presets or how they can be controlled by the dial.
The output still looks a little …not perfect but I don’t care. It does the job quite well. One of the biggest advantages: It doesn’t send a ‘Note OFF’ when live’s transport is stopped. That leads to the fact that the last position is stored and the moving head does NOT reset to it’s ‘zero-position’. Good thing just in case you are in the middle of a show and need to stop live’s transport. Sure it’s a good idea to have those kind of effect on the dimmer channels too because that way lights will stay on even if you stop.
You can, as well, apply the Max4Live device (which doesn’t have an interesting name yet) to other channels. The colour wheel, for instance. The result is the same: You can select colours from one of the presets or apply a colour chaser or controll the position of the colour-wheel in realtime via the midi-assignable dial.
Mein Hobby? Ich schreibe erotische Fanfiction basierend auf Gebrauchsanweisungen von elektrischen Küchengeräten der 70er und frühen 80er Jahre
Ganz manchmal steckt man so im Alltagstrott. Und dann hat man das Glück, Fotos vom letzten Jahr zu sehen und erinnert sich daran, wie unglaublich stolz und glücklich man zwischendurch einfach ist
1998 habe ich Max Frisch in meinem komplett zugemüllten Ford Fiesta durch Osnabrück chauffiert.
Gestern war einer der schlimmsten Tage des Jahres. Nicht des bisherigen Jahres.