Vor Kurzem kam ein Arbeitskollege auf mich zu mit der Bitte, ob ich mir mal seinen Wlan-Stick anschauen könnte. Angeblich funktioniert das Teil nicht mehr.

Vor Kurzem kam ein Arbeitskollege auf mich zu mit der Bitte, ob ich mir mal seinen Wlan-Stick anschauen könnte. Angeblich funktioniert das Teil nicht mehr.
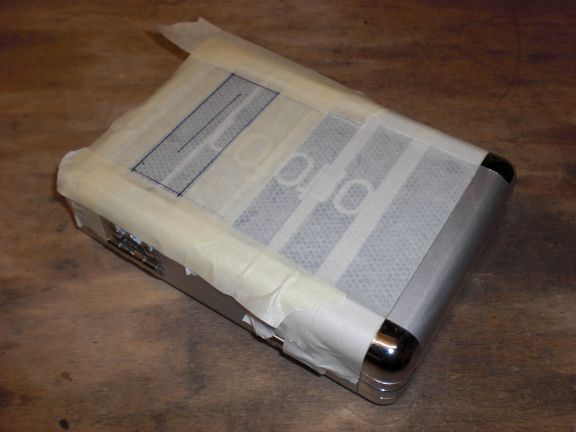
My current MIDI controller has a Mini-USB connector. This has to be one of the worst possible features of the device. I was facing a lot of garbage data and MIDI dropouts recently and it all came down to faulty contacts caused by this connector.

Even worse: the connector is attached on the left side of the device, drastically increasing the possibility of ripping it off unintentionally.
I already thought about attaching another type of USB connctor when I hacked the controller itself but somehow I forgot about it (or was too lazy or …).
Anyways… the problems I had were big enough and I wanted to test this kind of hack for quite a long time so it’s finally enough to start thinking about it:
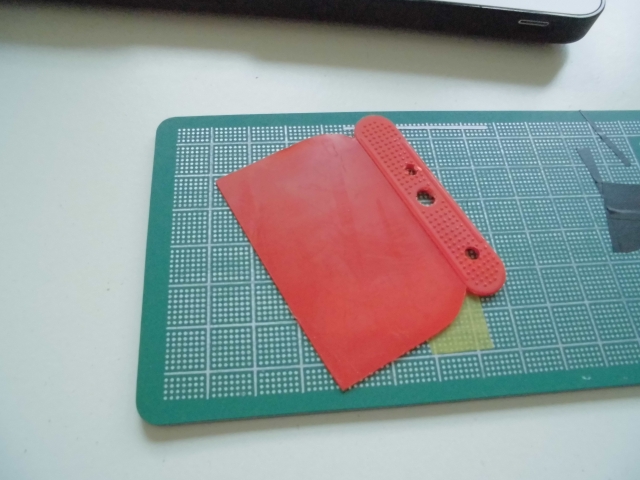
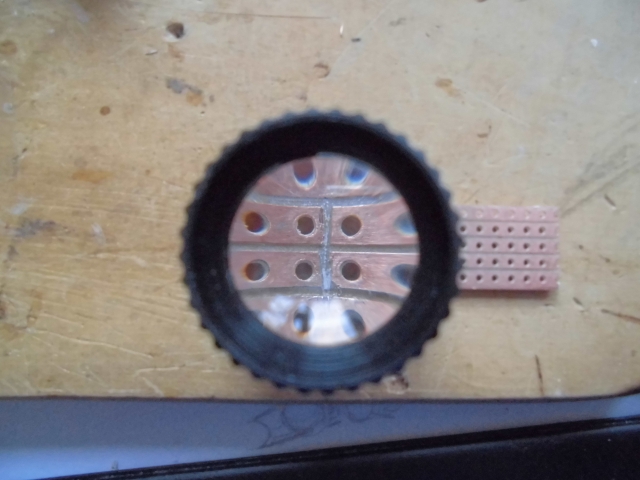
If you look very closely you see that there are 5 spring-loaded contacts inside a female Mini-USB connector. Right below every contact is a small hole. I guess that’s where the contact is stuffed into the plastic. My plan was to use these holes with a very thin wire so the wires would touch the contacts ‘from below’. In order to keep the wires from falling out I wanted to apply some pressure to the contacts via a thin piece of plastic.
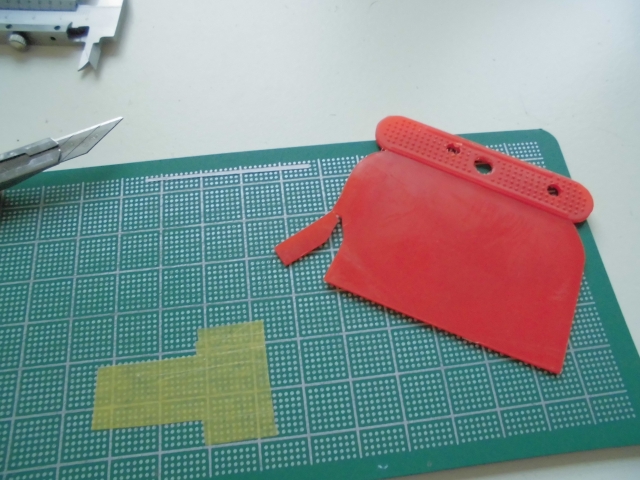
I had this one lying around and it turned out to have just the correct thickness. Only needed to cut a bit out of it.
Excellent
Here it all comes together (you only need 4 of the 5 contacts):
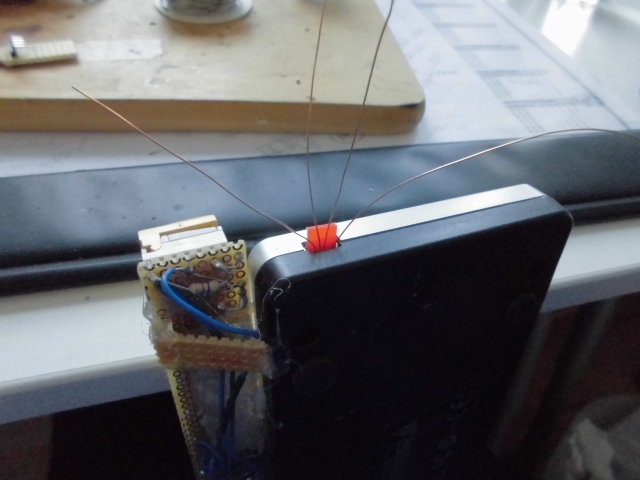
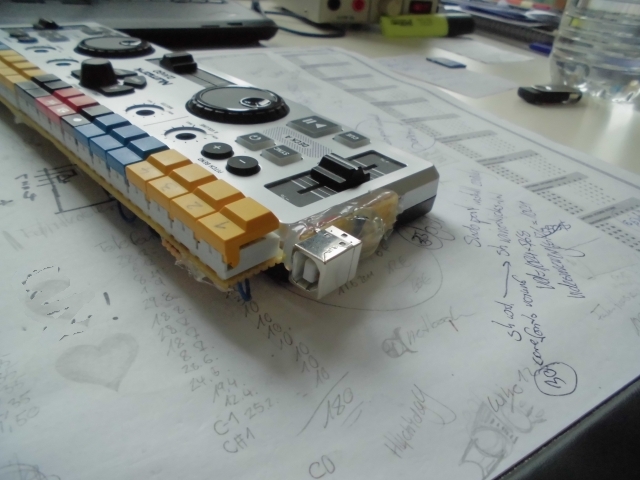
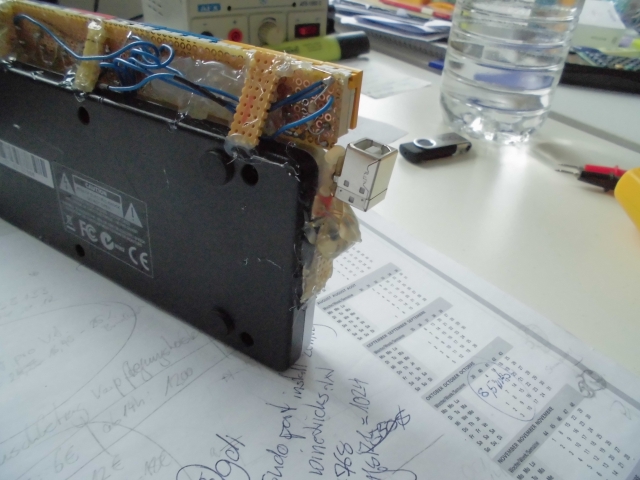
The wires are held in place surprisingly well so I built a small breakout-board with a somewhat sturdy USB B-Type connector:
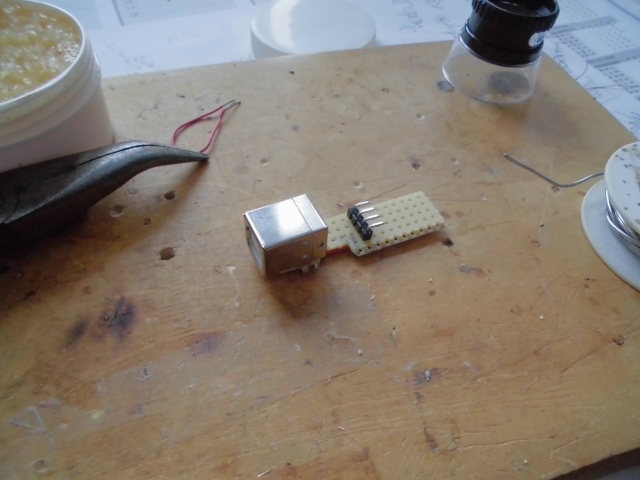
Don’t forget to cut the coppertraces so the shield is not shortenend with any of the 4 pins. Of course I forgot that and only realized it after applying the first ton of hotglue …

The board is attached to the side of the controller using hotglue, the wires are soldered to the corresponding pins. The wire itself is insulated by a clear coating which gets off as soon as you start soldering. As long as you don’t torture them too much there is no problem with shortcuts caused by touching wires.
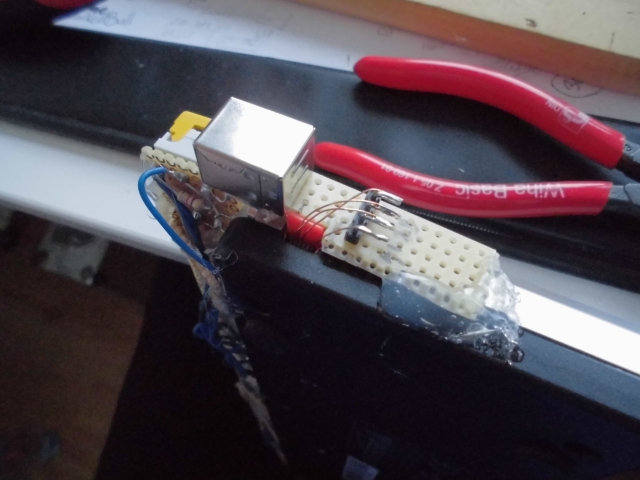
After i made sure everything is working fine I attached … slightly … more hotglue to make it ready for some rough handling:
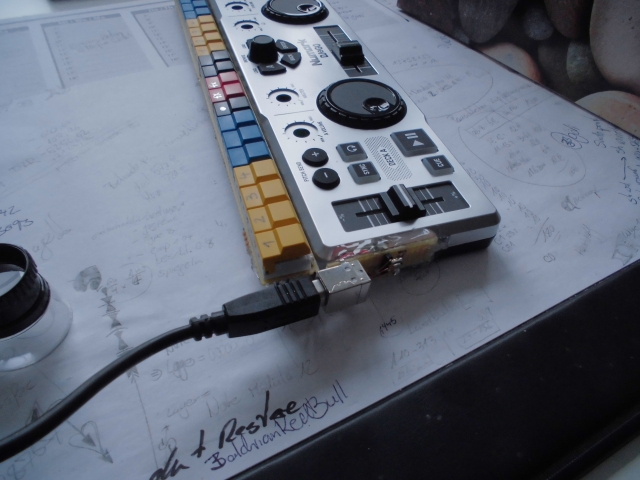
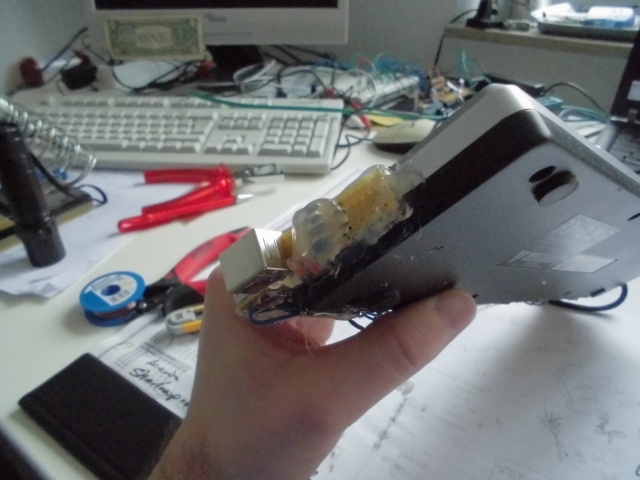
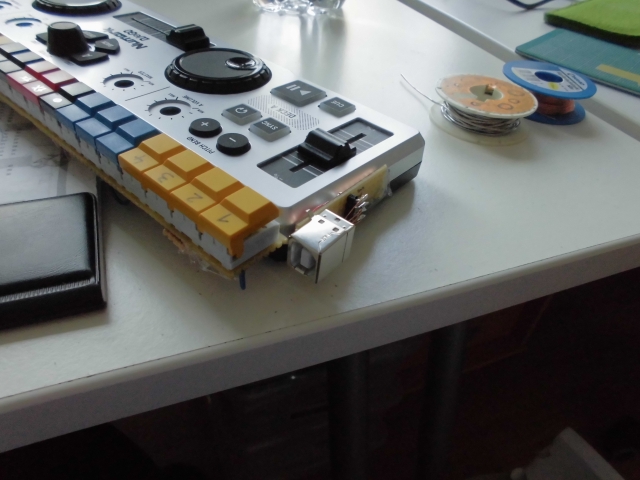
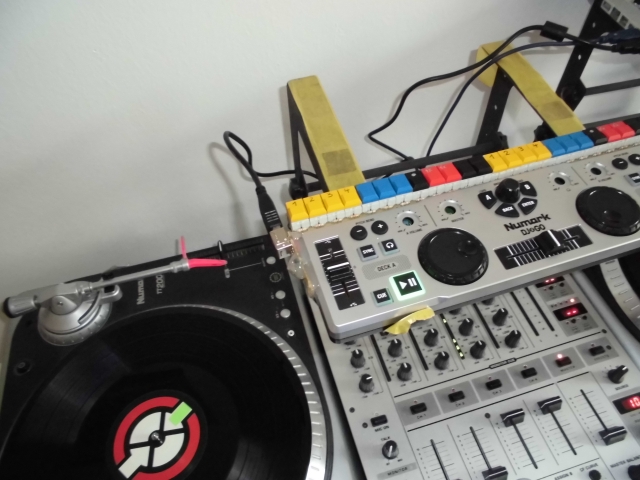
Looks fine, doesn’t it? I am not facing any faulty data or dropouts anymore, the connector is sturdy as hell and it is now pointing to/ from the back side of the device making it less prone to accidental pull-outs. Furthermore I now have to carry only one kind of USB cable with me whenever I’m out making music.
Simple A$$ DMX Over MIDI Expander
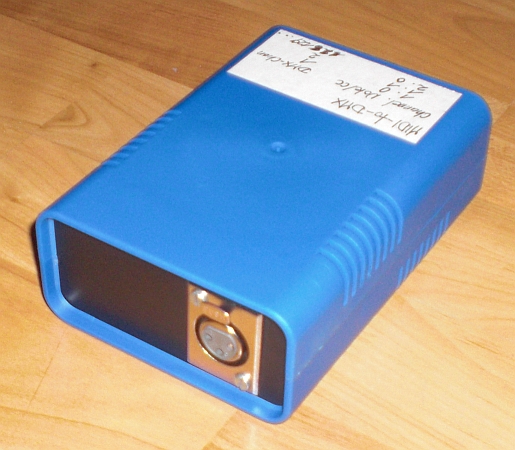
(a picture of a blue box….NOW I’ve seen it all)
As you already might have guessed this is a simple MIDI to DMX transceiver. It’s powered via USB and doesn’t need any additional drivers. On a German Windows XP it installs itself as an ‘USB Audiogerät’.
The aim of it is to have some practical solution to control lights with Ableton (any midi sequencer). In Germany we say “AEG: Auspacken, einschalten, geht” (which is a pun based on a german company’s name and means something like “unpack, switch on, enjoy”.)
There are, of course, other ways to control your lights via a midi sequencer. You could, for example, have a dedicated midi track in ableton to send out midi to your GrandMA onPC (any lighting software). This would give you the power of your lighting desk combined with the power of your midi sequencer.
On the other hand side this might be a little bit of overkill if you just want to drive some LED pars (or it might even be impossible if you never worked with a lighting software before). Furthermore you are always using your lighting software ‘blindsided’. you can just hope your midi clip triggers the correct chaser. I know from my experience that it really takes a lot of preparation to make sure every midi clip only triggers your desired lights. Many things can (and will) go wrong. Therefore it’s easy (and fun – somehow) to quickly edit your midi clip on your light-track (or group of tracks) and instantly see the changes you made. Don’t forget: If you are using midi clips you are automatically in sync with your sequencer. No need to send an extra clock signal etc.
However, you could also think about controlling your existing hardware lighting console via true DMX. Might lead to some interesting combinations if you are having a gig in a venue with a fixed lighting structure and a lightjockey who will give you control over his desk (as if that ever happened……).
Sadomex can send out DMX-signals based on incoming midi-notes or midi-CCs. The mode can be changed during usage. The communication works one way. It’s midi IN and DMX OUT.
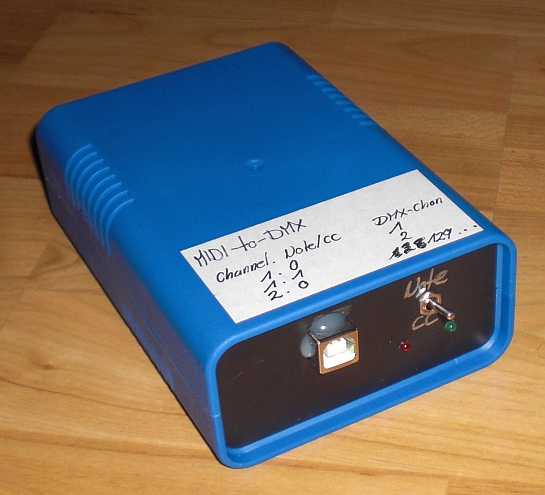
512 DMX channels are supported. This is achieved by using different midi channels. Midi Notes/CCs 0-127 on channel 1 represent DMX channels 1-128. Midi Note/CC 0 (the first one….however you may count) on midi channel 2 represents DMX channel 129 and so on….
Naturally, the resolution is only half as precise as native DMX since midi only supports a range of 128 values and DMX supports 256. There could be different workarounds but that would only make it more complicated. This way, a midi note’s velocity of 127 (full) represents a DMX channel’s value if 255.
This video shows the device in action with an LED Par lamp. Notice how the lights stay in sync with the metronome:
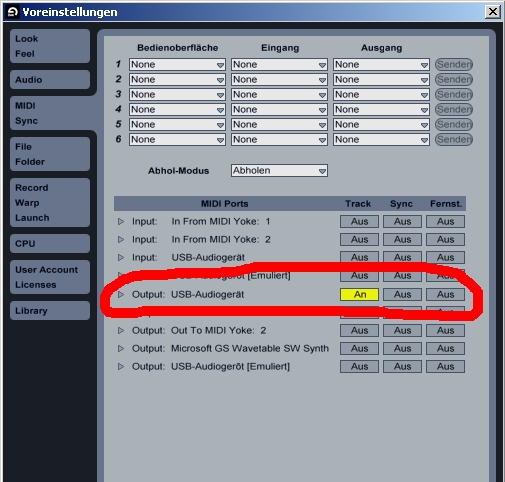
This is how you configure Ableton to talk to Sadomex. In this scenario the first 128 DMX channels can be addressed due to the output channel being set to 1. If you would like to control a fixture with a start-address greater than 128 (and smaller than 256) you would set the output channel to 2. Realize Ableton’s possibilities to group tracks. This way vou could control a whole bunch of fixtures as if they were midi clips. The clips in the screenshot, by the way, are those from the video above.

A demo file for Ableton 8.2 can be downloaded here . It shows some basic patterns for controlling an RGB LED Par at DMX address 10.
I put together another example which is a little more complex. This one controls a Coemar iSpot 575 EB with a base address of 194. Notice how the output midi-channel of the iSpot’s tracks is set two ‘2’ in order to reach DMX-address 194. The pinkish coloured clips are chasers (e.g. continuously change colourwheel 2 between colour 5 and 6) whereas the blueish-green ones represent static values (gobowheel 1 set to ‘open’).
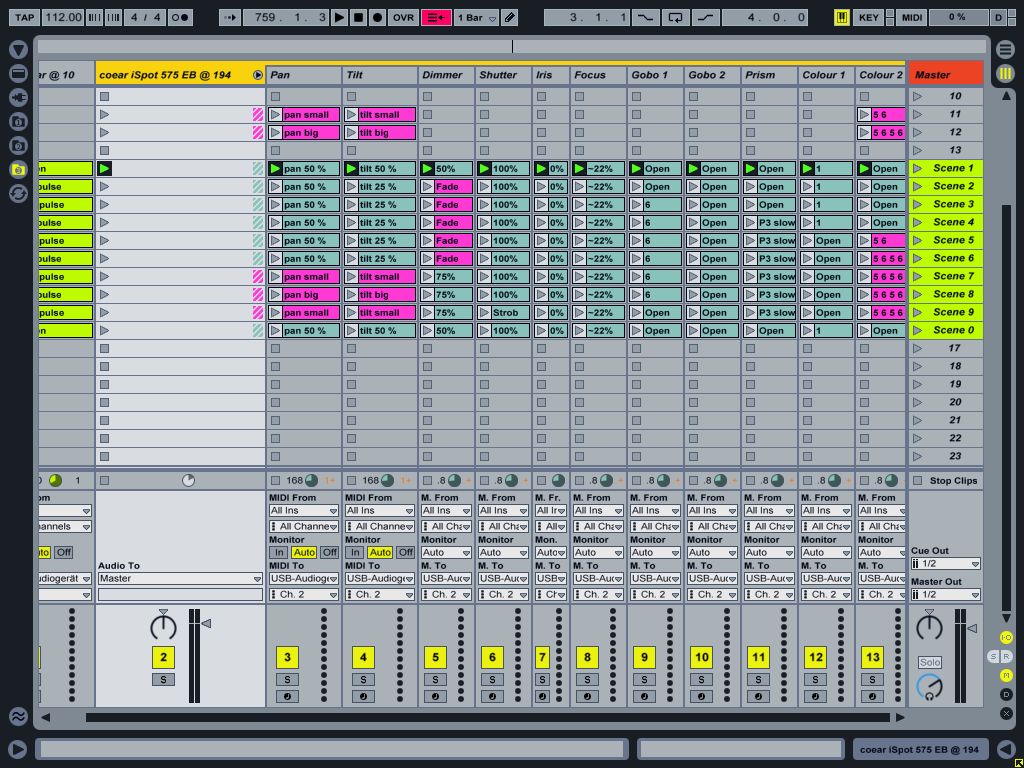
This is all done with Sadomex being in ‘Note’ mode (reacting to Midi notes and their respective velocity values…).In my eyes, Ableton’s workflow is not quite optimized for easily creating CC curves for this special scenario. Maybe it’s easy to achieve in-sync CC curves/values with other sequencers.
It surely IS a pain in the back to put together pan/tilt motion with midi notes. Furthermore you are really bound to a certain tempo when it comes to pan / tilt motion (a smooth tilt wave at 112 bpm like shown in the example won’t look as smooth at 65 bpm without being altered to a high degree). On the other hand side it’s fun thinking about what you might be able to do with things like Ableton’s built in Midi Effects like Velocity, etc….
This time it’s being controlled via Akai’s APC20 which makes it even more fun.
Due to my 1337 computer skillz (not) it was absolutely impossible for me to convert my video -with- audio. If you look carefully you see the LED Par from the previous example in the bottom of the movie. It’s flashing in sync. At least you can get an idea of what it’s all about:
http://www.youtube.com/watch?z=0WCg3YXyItQ&feature=player_embedded
You can download the second example file here .
I’m not quite sure how to proceed with this right now. At the moment (october 2010) all my resources are tied to other things. Maybe I’m going to build a few ones when there is time and sell or swap them. Contact me if you are interested in a unit or if you have any questions regarding the device.
[Update 31.10.2010]
Oh Ableton how much I adore love like you! After playing with the above setup for a time I was not really confident with Ableton’s native possibilities for live-editing the Midi (i.e. DMX) output. For example: It’s a quite common task to make a moving head point to a certain position and make it do its motion arround this position then. This can basically all be done by simple note-to-dmx conversion but it’s not as dynamically assignable and easy to do like you would with your dedicated lighting-controller (I guess you know I’m talking ’bout GrandMA…….). That’s why I had a look at Max 4 Live. Fortunately I have been tinkering with PureData before so the start was not that complicated for me. What came out is a nice little MAX midi effect doing all the necessary processing within one device:
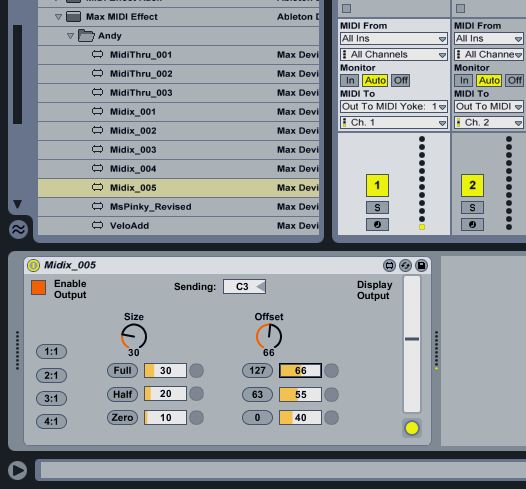
(I later realized that what I built is nothing more than an ordinary MIDI-lfo.) What the effect does is that it creates a sine-envelope for the velocity values of the incoming notes (those notes which are played in the active clip). Since everything is midi-assignable the amplitude of the sine (= the size of the effect) and the offset (= the position the head is moving around) can either be selected from fixed and user-configurable presets or they can directly be controlled by a knob or a fader (assigned to the dials in the screenshot). The sine’s periodicity (=fixed multiples of the motion’s velocity) can be selected from four presets as well.
(Yes…you surely Do have to look a little bit careful to locate the mouse and its actions in the lower left corner of Ableton…)
See how the Pan/ Tilt positions can be selected by triggering one of the presets or how they can be controlled by the dial.
The output still looks a little …not perfect but I don’t care. It does the job quite well. One of the biggest advantages: It doesn’t send a ‘Note OFF’ when live’s transport is stopped. That leads to the fact that the last position is stored and the moving head does NOT reset to it’s ‘zero-position’. Good thing just in case you are in the middle of a show and need to stop live’s transport. Sure it’s a good idea to have those kind of effect on the dimmer channels too because that way lights will stay on even if you stop.
The video below shows this behaviour quite well.
http://www.youtube.com/watch?=rapt_2Bsvsk&feature=player_embedded
You can, as well, apply the Max4Live device (which doesn’t have an interesting name yet) to other channels. The colour wheel, for instance. The result is the same: You can select colours from one of the presets or apply a colour chaser or controll the position of the colour-wheel in realtime via the midi-assignable dial.
Das Ortofo V2 is a nice tool to use the Behringer BCF2000 fadercontroller with a GrandMa lighting desk. It gives you the functionality of using motorfaders and supports all the Elements of the BCF2000 to be used with GrandMA (onPC).
Here is a video to demonstrate its functionality:
I’ve built version 1 a few years ago and since then have been asked a lot of times about the possibility for USB support and whether I’m selling them.
Good news: Das Ortofo now supports native midi over USB. Furthermore did I build a batch of 10 devices which are all for sale (September 2010). Contact me if you want to get one.
The following diagram shows how everything is connected (click for larger image):
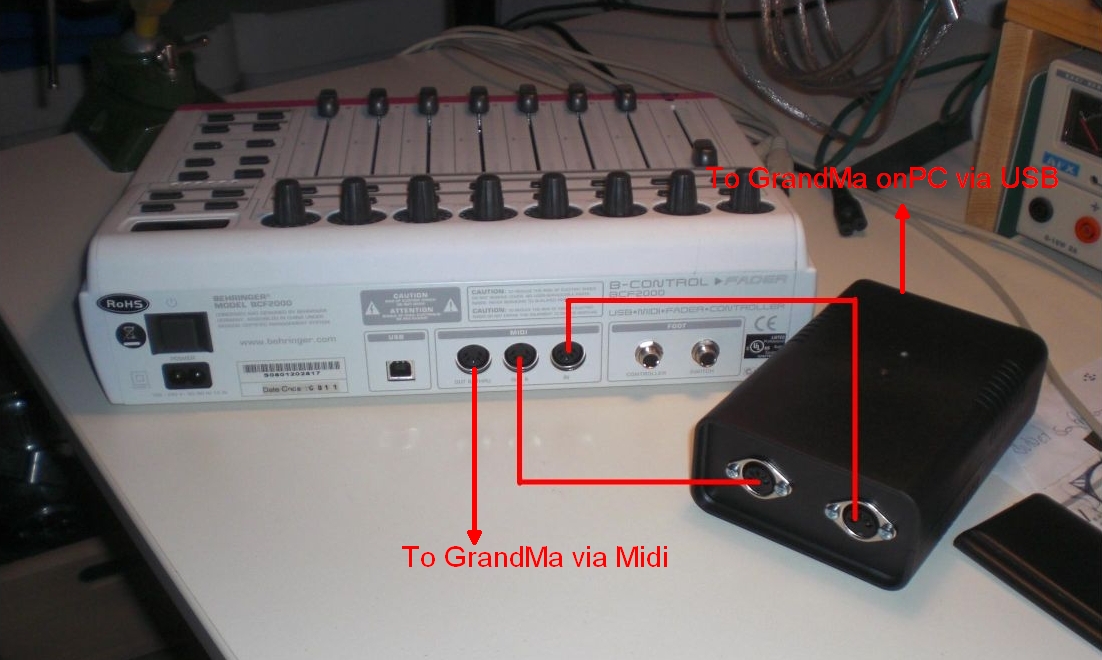
This one might be interesting for all you GrandMa onPC users out there. Those who are operating a GrandMa Micro or Pico and are missing the motorfaders of the fullsize console might also benefit from it. Das Ortofo is a hardware-based midi processor especially designed for controlling the motorfaders of a Behringer BCF2000 and sending the corresponding MIDI-data to the GrandMA lighting desk.
[Update 30.9.2010: I’ve built a new version which natively supports USB and which is for sale. Find it over here .]
The Video says it all:
[tube]http://www.youtube.com/watch?v=1QmLDfRrPaw&feature=player_embedded[/tube]
Beautiful, isn’t it?
By having a look at the next pictures you should easily be able to find out where the name is derived from….