[31.7.2006]
dies ist wohl mein bislang aufwendigstes projekt. solange und ausschweifend habe ich zwar auch schon über viele andere sachen gesprochen, hiermit habe ich mich aber bei einer noch nie dagewesenen anzahl an leuten durchschnorren müssen, um das ziel zu erreichen. auf geht’s:
finalscratch von stanton/ native-instruments ist ein dj-tool. man hat damit die möglichkeit, digitale musikdateien mit normalen plattenspielern zu kontrollieren. dazu werden die plattenspieler an eine box (den sog. ‘scratchamp’) angeschlossen. mittels speziell präparierter timecode-vinyls liefern die plattenspieler signale, die vom scratchamp umgewandelt und als steuersignal (songposition, geschwindigkeit,…) via firewire an einen angeschlossenen computer mit entsprechendem mp3-player (derzeit: ‘traktor’ von native-instruments) weitergeleitet werden, um dort mp3s etc. abzuspielen. stop. absetzen und letzten satz nocheinmal lesen. wer das ding mit einem laptop mit durchschnittlicher festplatte bertreibt, kann so jedenfalls locker 10000 songs im rucksack mit sich herumtragen.
der vorteil hierbei liegt zum einen ganz klar in der gewichtsersparnis: wer schonmal die durchschnittlichen 4-5 plattenkoffer vom parkplatz duch die disko (treppe ‘rauf, treppe ‘runter, durch den flur, über die strasse, durch die stadt….) tragen durfte, weiss das knappe kilo eines laptops noch viel mehr zu schätzen als gewöhnlich. ausserdem verändert sich im vergleich zu anderen produkten (cd-player mit jog-wheel etc) nicht das ‘handling’
. jeder, dj weiss, wie sich ein plattenspieler (natürlich nur der 1210er von technics, is’ klar) verhält und muss sich nicht umstellen- wäre ja auch zuviel verlangt.
so – genug werbung =-P.
das problem an dem ding: so genial die idee, so teuer wird sie verkauft. derzeit kostet ein aktuelles finalscratch 2 (nur die software und der scratchamp…kein laptop, keine plattenspieler, kein mischpult) um die 750€. sicherlich ein gerechtfertigter preis (hüstel), wenn man alle features braucht, aber sicherloch (got it? hihi) viel zu teuer, wenn man nur mal damit rumspielen will.
(an dieser stelle sei kurz eingeworfen, daß es auch von anderen firmen ähnliche produkte gibt, aber finalscratch lag gerade ‘rum, also hab’ ich das genommen.)
das ziel wird es also sein, eine irgendwie geartete möglichkeit zu finden, die bestehenden timecode-vinyls für eigene zwecke zu missbrauchen. ganz wichtig: es geht hier um den spass an der sache. das wird ein projekt ohne jedweden kommerziellen hintergedanken. natürlich habe ich weder die lust, noch die zeit, noch die ambition (noch die rechtsanwälte…), um auf basis der timecode-vinyls ein konkurrenzfähiges produkt auf den markt zu bringen. es geht hier einzig um den spass am gerät. so.
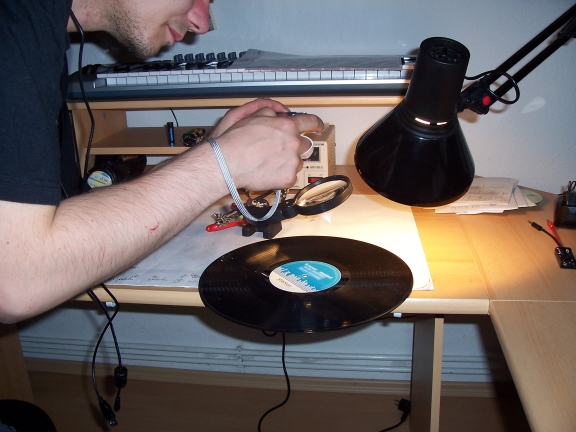
dazu geht es erstmal der platte an den kragen. lange genug habe ich überlegt, wie der erste schritt zur analyse des timecodes sein kann. mein ehemaliger nachbar [swen] hatte beim gemeinsamen bier auf meinem balkon eine der besten ideen: draufschauen. so sieht es also aus, wenn man ganz genau hinguckt:
eines der wichtigsten bilder: dieses foto stammt von der 45’er-seite (die seite, die mit 45 u/min gespielt wird….).man kann geilerweise sofort erkennenen, daß die daten des timecodes in paketen daherkommen. die gesamte seite der platte besteht übrigens nur aus einem großen track. die abstände, die man auf dem foto erkennen kann, dienen als optische rückkopplung: jede der großen rillen markiert eine minute spielzeit.
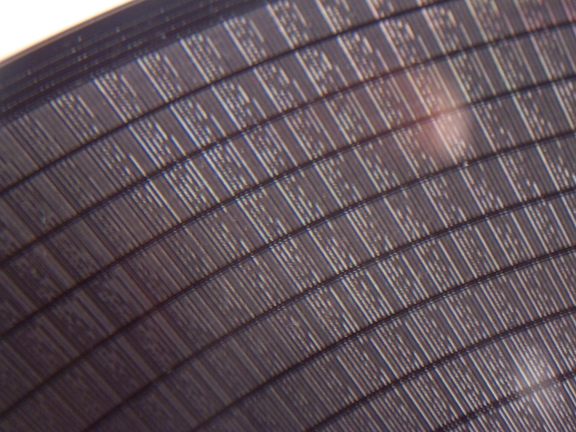
mit ein wenig überlegung kommt nun folgendes dabei heraus: während einer umdrehung der platte werden 200 der gut sichtbaren datenpakete von der nadel überflogen (hab’s nachgezählt). bei 45 u/min sind das 9000 datenpakete/min, also 150 pakete pro sekunde (weil 9000 / 60 = 150, PUNK =-) ). das bedeutet wiederrum, daß die nadel 6,6(66666) milisekunden braucht (1/150, quasi), um ein datenpaket hinter sich zu bringen.
darauf kann man aufbauen.
also just mal den timecode mit der hilfe von [h0|2sT] und seinem equipment digitalisiert (ich muss gestehen: ich besitze keinen plattenspieler mehr =-/).
ich habe von der digitalisierten 45’er-seite einer timecode-vinyl mal ein beliebiges, (..auch cool edit pro wird bei den dimensionen schließlich zu einem schätzeisen degradiert) etwa 6,6 milisekunden langes stück markiert. oben ist der eine kanal, unten der andere (ist aber egal, die sind identisch, habe ich an mehreren stellen geprüft). je nachdem, wie man die grafik interpretiert (nur die ‘berge’ oder auch die ‘täler’), kommt man auf einen informationsgehalt von 8, bzw 16 bit.
das sieht in etwa so aus:
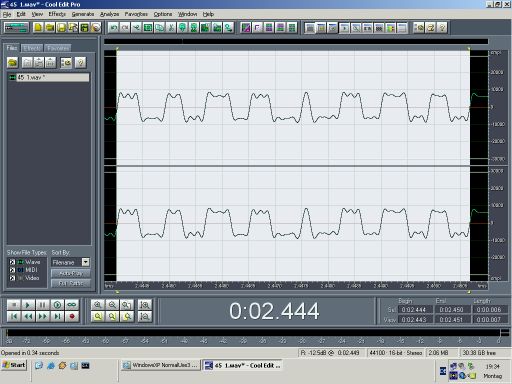
(wer ganzganzganzgenau hinsieht, kann auch erkennen, daß cooledit nicht in meiner standard-vmware-session läuft…egal)
geht man von der höchstmöglichen informationsdichte (also 16 bit) aus, muss man diese zahl noch einmal halbieren, weil:
eine platte ja auch rückwärts bewegt werden kann. das bitmuster ‘11110000’ darf es zwar theoretisch geben, aber nur wenn es ‘00001111’ nicht gibt (wenn es doch so wäre, könnte die software nicht wissen, welche der beiden stellen nun welche wäre und ob sie vor- oder rückwärts gespielt würde). bleiben also 256 (28) mögliche, eindeutige kombinationen über.
da passt was nich’, das ist viel zu wenig. der gedanke tut sich auf, daß die information, an welcher stelle der platte sich die nadel gerade befindet, unterschiedlich verpackt wird. ich denke es gibt ‘magic packets’, die in bestimmten intervallen eine absolute position markieren. dazwischen könnte dann mit immer gleichen paketen gearbeitet werden, die eine relative information enthalten.
was zu beweisen wäre.
es führt also kein weg dran vorbei: ich muss dieses ding haben und damit ‘rumspielen. dank [marc] habe ich für einige tage (“bis donnerstag, und dann musst du das wieder anschliessen, sonst is’ was los und wehe, du gehst da mit’m schraubenzieher bei”) ein finalscratch2 zur verfügung:
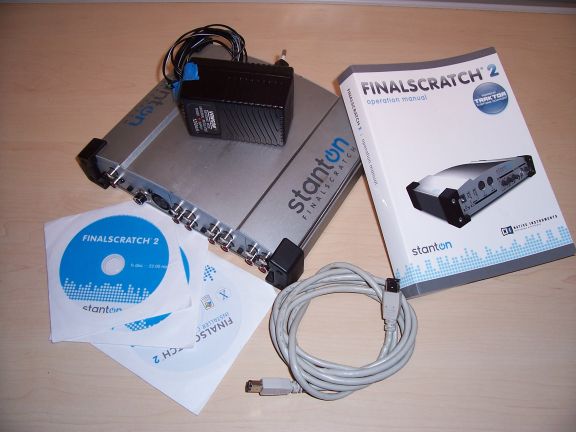
dankenswerter weise hat [marcel], also ER HIER mir eine timecode-platte quasi gestiftet (bekommst du wieder, klaro…dauert nur noch etwas =-) )
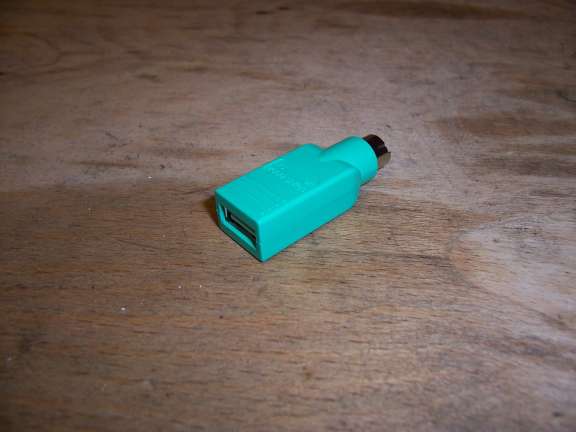
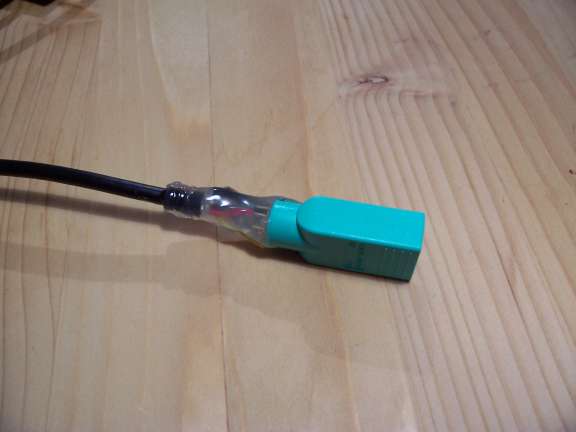
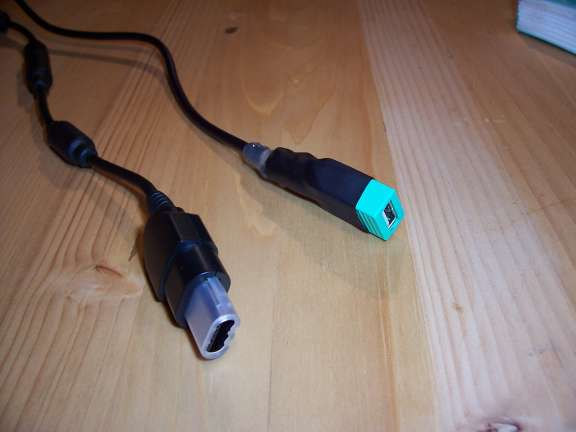
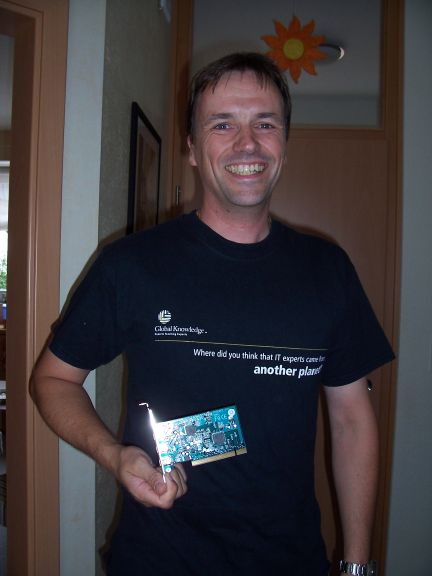
von [karsten] habe ich die notwendige hardware für die firewire anschlüsse:
und den 1210er hab ich von [shimon]. hab auch mal gleich ‘nen satz sticker draufgemacht:
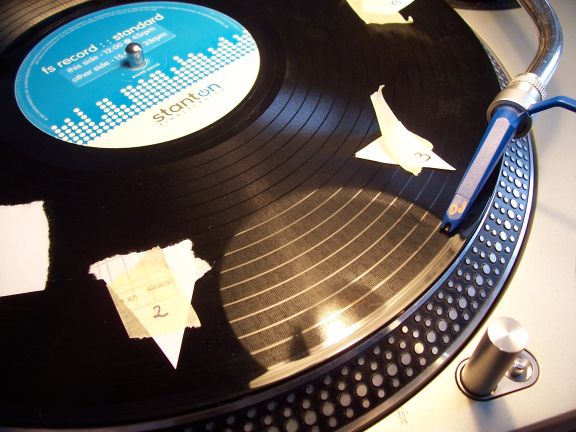
die sache ist nämlich die: so ein ‘magicpacket’ gibt es garnicht (diese erkenntnis hat mich eine ganze nacht gekostet). geilerweise scheint es so zu sein, daß jedes halbwegs kontrollierte rauschen eine vorwärtsbewegung der musikdatei im player erzeugt.
mit hilfe der aufgeklebten marker habe ich herausfinden können, daß die absolute position der nadel auf der platte durch eine gewisse anzahl an paketen zusammengesetzt wird, über die die nadel in einer bestimmten zeit streifen muss. das prinzip wird morgen verdeutlicht. von der ganzen (achtung:) plattenkratzerei hab’ ich rückenschmerzen und kopfschmerzen vom jägermeistertrinkern. so long.
[mehrere stunden später:]
tja, das mit dem digitaliserten timecode weiter oben war wohl nicht so ganz richtig. ich habe gestern nacht nocheinmal folgendes ausprobiert:
-abspielen eines tracks mit timecode-vinyl: alles i.o.
-abspielen eines tracks mit timecode-vinyl jedoch nur den rechten/linken kanal vom plattenspieler dran: nur relative positionen. heisst: wenn man den plattenspieler nur mit jeweils einem kanal betreibt, kann man immer noch ein ‘zähl’-signal erzeugen. das deckt sich mit der theorie, das ein gewisses grundrauschen jedenfalls reicht, um dem softwareplayer ein signal ‘platte dreht’ mitzugeben. setzt man die nadel um, wird der track aber an der selben stelle wie vorher weitergespielt. allerdings kann man den track auch rückwärts abspielen. gestern konnte ich noch soviel herausfinden, daß es offensichtlich reicht, die platte einmal komplett zum stillstand (= kein signal an der nadel) zu bringen, um der software eine richtungsumkehr vorzugaukeln.
damit ist die theorie von den zwei gleichen audiokanälen, die sich durch den oben digitialisierten timecode einschleichen konnte, etwas hinfällig. eine erneute digitalisierung (diesmal mit dem scratchamp selber) hat dann auch schnell gewissheit gebracht.
zur besseren vergleichbarkeit mal wieder ein 6,6 ms kurzes stück digitaliserten timecodes:
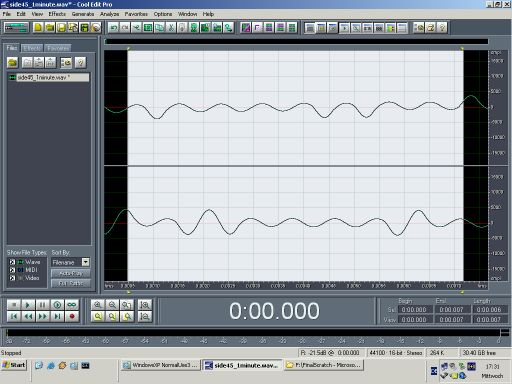
das sieht ja jetzt schon mal wieder etwas komplizierter aus. schade eigentlich.
durch die spielerei am vortag konnte ich herausfinden, daß eine gewisse anzahl an paketen (eine bestimmte strecke auf der platte) in einer gewissen zeitspanne durchlaufen werden muss, damit die software die absolute position der nadel auf der timecode-vinyl (und somit die abspielposition des track) bestimmen kann.
wie das geht, wird hier einmal verdeutlicht: der motor wird angestellt, die platte wird festgehalten. die nadel wird auf anfang gestetzt, der player entsprechend eingestellt. durch leichtes scratchen wird deutlich, das man ‘stille’ hört. anschliessend wird die nadel auf eine definierte position (wegen der nötigen wiederholungen) gesetzt. hier ist es die erste-minuten-rille und der marker ‘1’. dann wird die platte losgelassen (der motor läuft schon, damit die platte von vornherein die annähernd richtige geschwindigkeit hat). dann wird geschaut, wie weit der weg ist, den die platte zurücklegen muss, bis im player von ‘stille’ (also anfang des tracks) auf ‘position 1 minute’ umgestellt wird. das ganze muss man einige male machen. je nach geschwindigkeit der platte erhält man unterschiedliche ergebnisse.
[tube]http://www.youtube.com/watch?v=cMBZfbSMSPk&feature=player_embedded[/tube]
glücklicherweise kann man so sachen wie ‘latenz’ weitestgehend aussen vor lassen, weil man das auch ohne drehenden plattenteller machen kann. wenn man das experiment wiederholt, die platte aber nur von hand bewegt, kann man das auch nachvollziehen. es wird aber ebenso deutlich, daß die geschwindigkeit, mit der die platte bewegt wird, von entscheidender bedeutung ist:
wenn man die platte nach dem umsetzen der nadel auf die position ‘1 minute’ ganz langsam dreht, so werden wierder nur relative timecode informationen durchgegeben. der track bewegt sich zwar im player, aber nur so, als hätte man die nadel NICHT umgesetzt.
[tube]http://www.youtube.com/watch?v=nXekmjAATRg&feature=player_embedded[/tube]
wenn man die platte übrigens ganzganzganzlangsam bewegt, passiert gar nichts. auch die einzelnen timecode-pakete werden also nur verarbeitet, wenn sie in einer bestimmten zeitspanne unter der nadel durchlaufen, macht ja auch sinn.
man wünscht sich eine timecode-platte, die man nach belieben bespielen könnte, also z.b. immer nur die stelle zwischen den zwei markern, um wenigstens mal ein wenig einzugrenzen, was man so betrachten muss, bzw eigenen timecode zu erzeugen und testen zu können.
hab ich gemacht .
.
hierbei wurde parallel zum traktor das program ‘cooledit’ gestartet und darüber der digitalisierte timecode eingespielt, indem ein kabel von unterschiedlichen soundkarten des rechners (auch scratchamp) wieder in den scratchamp ging. die ergebnisse waren teils berauschend. der scratchamp (diesmal als echt gute soundkarte) hat’s aber gebracht.
das letzte, an das ich mich erinnern kann (himmel. ich muss meinen lebensstil ändern-ganz schnell) war, das man den digitalisierten timecode via CoolEdit um 12db ‘amplifien’ musste (damit er ‘laut’ genug ist) und dann gings eigenlich los. achtet das:
[tube]http://www.youtube.com/watch?v=gU4EgGi-7ws&feature=player_embedded[tube]
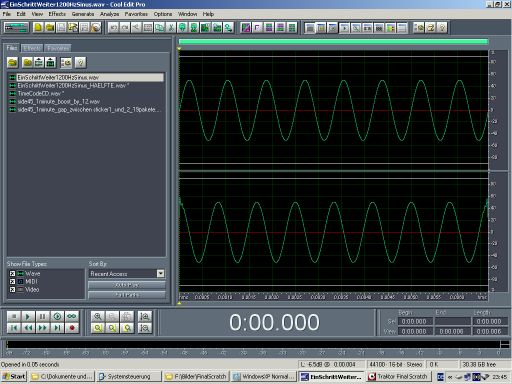
[ole w.] und ich (ole hat übrigens enorm viele gute ideen für einen einzelnen menschen) haben dann ein wenig mit timecodes herumgespielt (weil wir ja jetzt wissen, was man dem ding alles irgendwie unterjubeln kann) und festgestellt, daß tatsächlich i r g e n d e t w a s reicht, um dem player eine bewegung der platte vorzugaukeln. das heißt im klartext: wir haben angefangen mit einem sinuston 1200Hz. dieser gibt (als timecode verkauft) den track in annähernd richtiger geschwindigkeit wieder:
aber wenn man herausfinden will, wie etwas funktioniert, dann muss man die grenzen ausloten, also kamen wir nach kurzer zeit auf dieses:
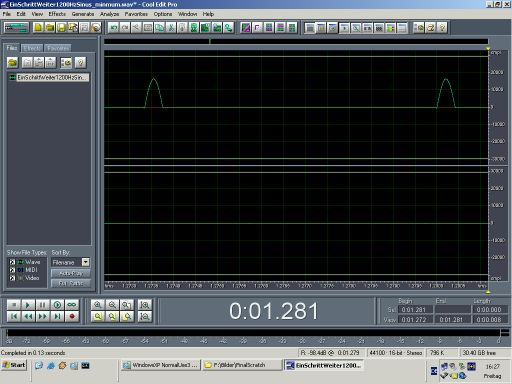
das ist dieselbe nummer wie oben, nur, daß 7 wellenberge fehlen und durch ‘stille’ ersetzt wurden. das dolle daran: es funktioniert auch! das wichtige (achtung:wichtig!): die abspielgeschwindigkeit des tracks im player ist nur ein bruchteil (ich mag sagen: ein achtel) der annähernd normalen geschwindigkeit. damit ist eine wichtige erkenntnis getroffen:
wie auch immer der timecode aufgebaut ist, es kann kein verfahren sein, daß frequenzmodulation einsetzt. anderenfalls würde sich die abspielgeschwindigkeit des tracks im player ständig ändern (wie hier gesehen). hinsichtlich der notwendigen robustheit und ausfallsicherheit ist damit zu rechnen, daß jedweder algorhithmus zum ausgleich (eines frequenzmodulierten verfahrens) zu anfällig für störungen wäre und somit tunlichst nicht eingesetzt würde.
[tube]http://www.youtube.com/watch?v=9_68u6OMj3E&feature=player_embedded[/tube]
man kann/muss spätestens jetzt darüber nachdenken, wie die information denn nun tatsächlich auf der platte festgehalten wird, und warum es zwei spuren gibt, die nicht synchron sind, sondern immer versetzt durch die nulllinie laufen. (das bild zeigt das deutlich an einem wahllos ausgesschnittenen stück timecode):
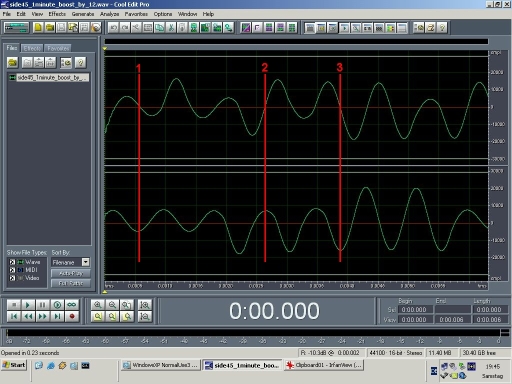
fakt ist: die relative position/fortschreitende drehung der platte wird durch die nacheinander auftretenden amplituden der beiden kanäle erzeugt. zieht man die linke ODER die rechte signalleitung des plattenspielers während des anspielens aus dem scratchamp, dann funktioniert es prinzipiell immer noch. heisst: der track im software-player läuft unbeeindruckt weiter, der scratchamp gibt also ganz normal die information ‘platte dreht sich’ an die software weiter, was sich ja auch mit der erkenntnis deckt, daß man dem ding prinzipiell irgendein rauschen vorsetzen kann und es funktioniert. aber: wenn man die nadel im track umsetzt, hat das keinerlei auswirkungen, der track spielt nach dem aufsetzen einfach an der stelle weiter, an der man die nadel von der platte nahm. die absolute position der nadel auf der platte wird also aus der summe der beiden audiospuren in der plattenrille gebildet.
was man bei oben beschriebener handlung hin und wieder feststellen kann ist, daß sich die abspielrichtung des tracks in der software ändert. da dieses phänomen mit beiden signalleitungen nicht auftritt, wird deutlich, daß auch die (abolute?) drehrichtung der platte aus der summe der beiden audiokanäle gebildet wird.
[die letzten beiden absätze gab es in etwas weniger ausführlicher bescheibung auch schon etwas weiter oben. das ist mir nach dem achten vierten dritten zweiten mal lesen auch aufgefallen. ich lasse es aber so. das ding hier wächst schliesslich und solche auswüchse gehören meines erachtens genauso zur dokumentation, wie der eigentliche technische inhalt. ausserdem wäre es irgendwie zu aufwendig zu professionell und zu wenig persönlich, hier jedesmal alles umzuschreiben.]
ganz nebenbei kann man übrigens feststellen, daß der scratchamp/die software intern umschaltet, wenn eine signalleitung ausfällt. zieht man die signalleitung nur so eben aus dem scratchamp, verlangsamt sich die abspielgeschwindigkeit des tracks im player (um die hälfte?). zu erklären ist das mit der tatsache, daß eine nicht komplett herausgezogene signalleitung ein rauschen am eingang des scratchamp verursacht und deswegen die interne umschaltung noch ‘mit sich hadert’, während am signaleingang nur noch die hälfte der geschwindigkeitsgebenden impulse ankommt. (wenn keine umschaltung erfolgen würde, so würde das rauschen des steckers am eingang eine erhöhung der abspielgeschwindigkeit mit sich bringen, weil dadurch mehr impulse pro zeiteinheit am eingang anliegen würden). passiert aber nicht, siehe video.
[tube]http://www.youtube.com/watch?v=hF0ZvvvAB6o&feature=player_embedded[/tube]
(der track kommt übrigens vom ‘elektrochemie lk’ und heisst ‘gold’. solltet ihr kaufen, weil’s geil ist. z.b. hier)
